
Hi guys, in this article we will continue with our project sales management. After create model, service and mockup data, next we will create User Interface (UI). For demo, we will use template SAP Fiori Element to create UI. Before go to this article, kindly follow previous articles
GENERAL USER INTERFACE – UI
Go to BAS – Projects
View – Command Paralette


UNDERSTAND FOR FIORI UI ANNOTATION FILE IN CDS PROJECT
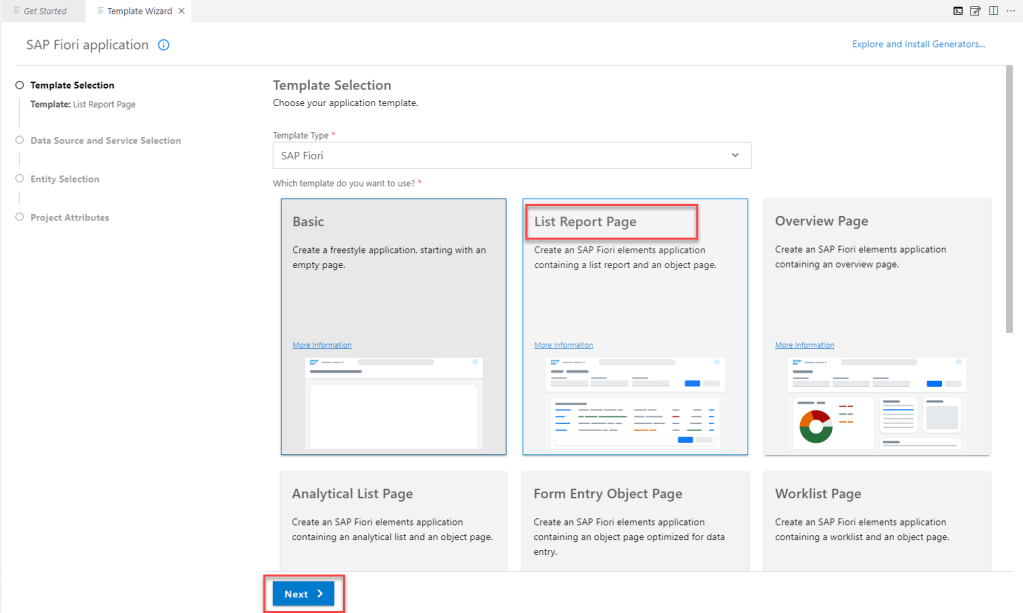
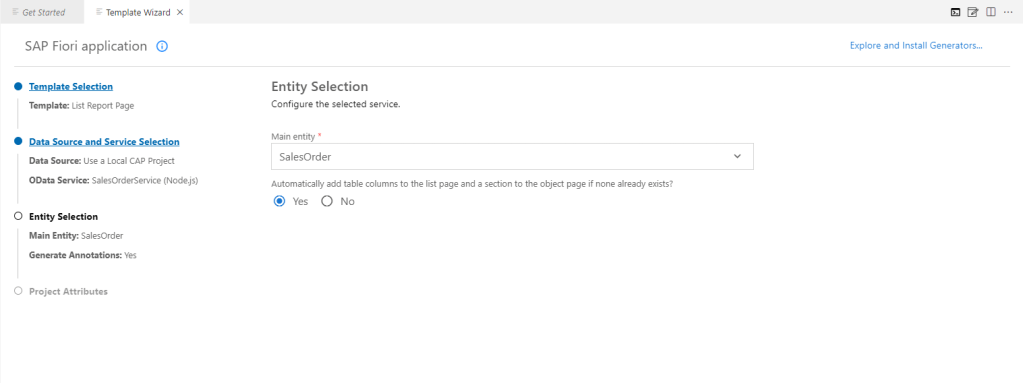
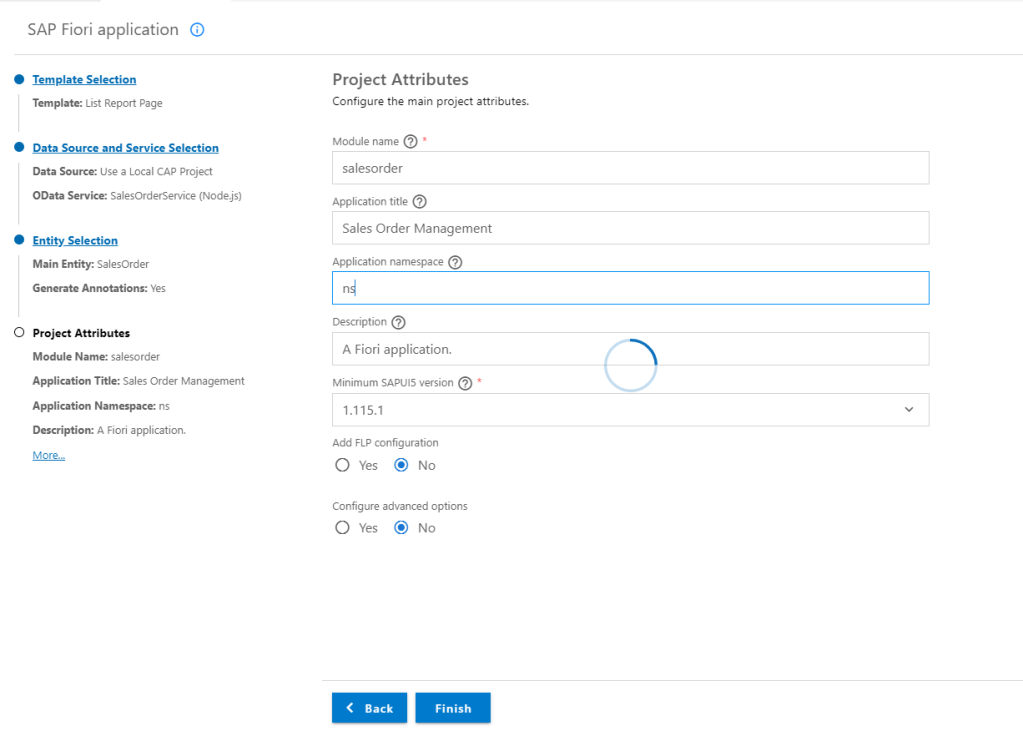
After create UI with Fiori Elements, something which we need to focus
Entire UI content goes into the app/ folder and we will create files annotation inside this folder

Project will be organized with this structure
| Project (Folder/File) | Content |
| app/ | UI content |
| db/ | Domain Models and db-related content |
| srv/ | Service definitions and implementations |
| package.json | Your project descriptor |
In CAP project, files annotation built with structure
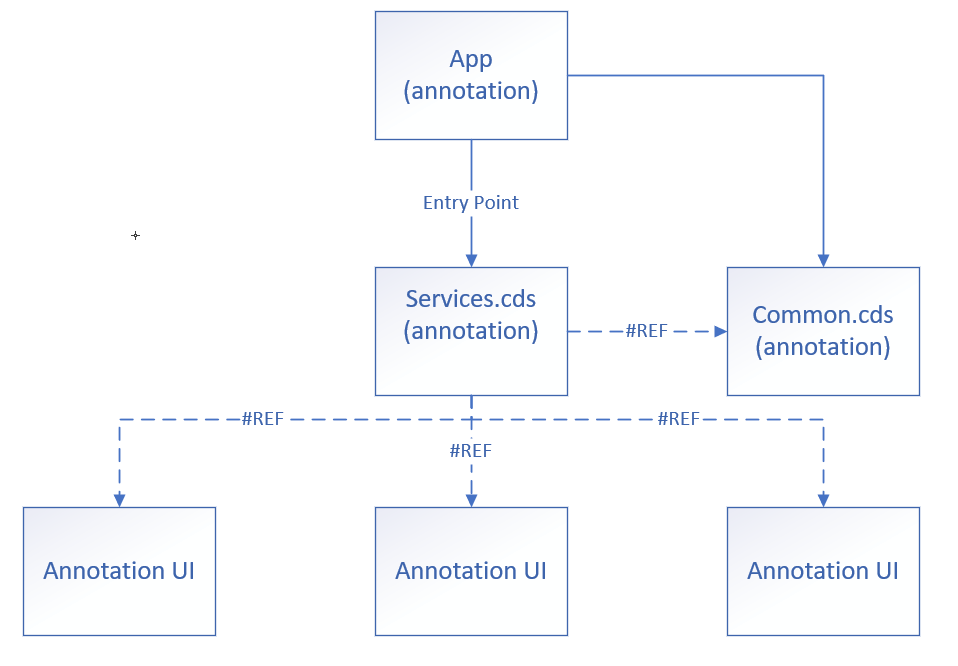
Annotations.cds : This files will be contain code for UI like FIELDGROUP or LINEITEM. It will be generated automatically when we run Fiori App Generator. Further, every app we will have one file annotation.cs in it.
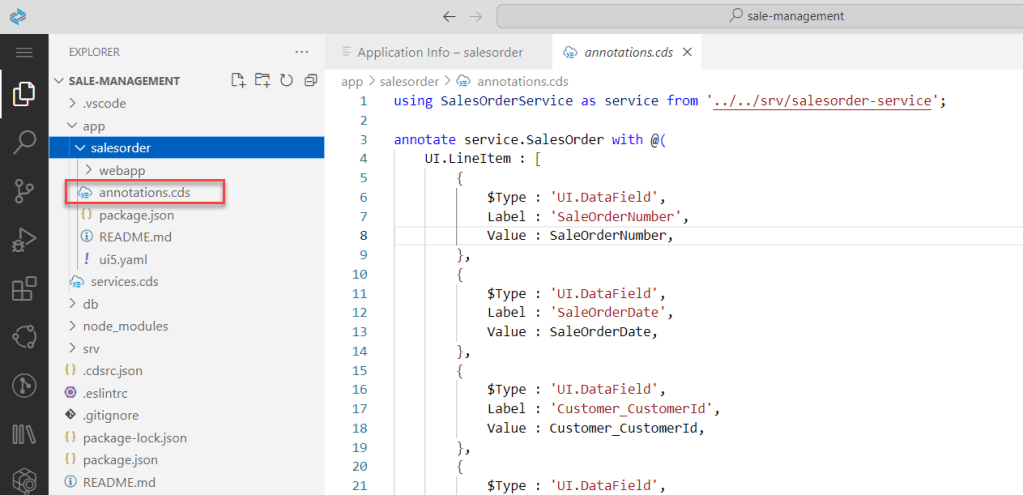
Common.cds : This file will be contain code which support for UI like TITLE, DATA REFERENCE for dropdownlist control… Purpose of this file is avoid writing redundant annotations for the same entities or schemas.
Services.cds: This file is entry point of annotation, all annotations in project should be referenced from this file.
CREATE ANNOTATION FOR APPLICATION SALESORDER MANAGEMENT
Right client on folder app, create new file with extension CDS and named common.cds
Add annotate for Sales Order element

// Annotate SalesOrder elements
annotate sm.SalesOrder with {
    SaleOrderNumber @title: 'SaleOrder Number';
    SaleOrderDate   @title: 'SaleOrder Date';
    Customer        @title: 'Customer';
    DeliveryAddress @title: 'Delivery Address';
    TotalAmount     @title: 'Total Amount';
    TotalTax        @title: 'Total Tax';
    SaleOrderNote   @title: 'Sale Order Note';

}
Add annotate for Customers element

// Annotate Miti elements
annotate sm.Customers with {
    CustomerId      @(
        UI.Hidden,
        Common: {Text: CustomerName}
    );
    CustomerName    @title: 'Customer Name';
    CustomerAddress @title: 'Customer Address';
    CustomerEmail   @title: 'Customer Email';
    CustomerPhone   @title: 'Customer Phone Number'
}
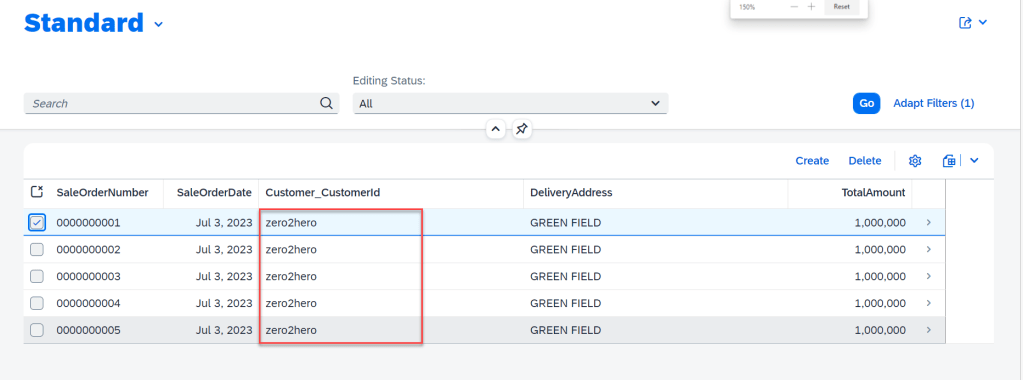
Because of Customer which displat in list SalesOrder is ID, but we want to display customer name. So, we add one more annotate to do this.

annotate sm.SalesOrder with {
    Customer @(Common: {
        //Display text instead for Customer ID in Sale Order
        Text           : Customer.CustomerName,
        TextArrangement: #TextOnly,
        ValueList      : {
            Label         : 'Customers',
            CollectionPath: 'Customers',
            Parameters    : [
                {
                    $Type            : 'Common.ValueListParameterInOut',
                    LocalDataProperty: Customer_CustomerId,
                    ValueListProperty: 'CustomerId'
                },
                {
                    $Type            : 'Common.ValueListParameterDisplayOnly',
                    ValueListProperty: 'CustomerName'
                }
            ]
        }
    });

}
Reference to file common.cds from services.cds

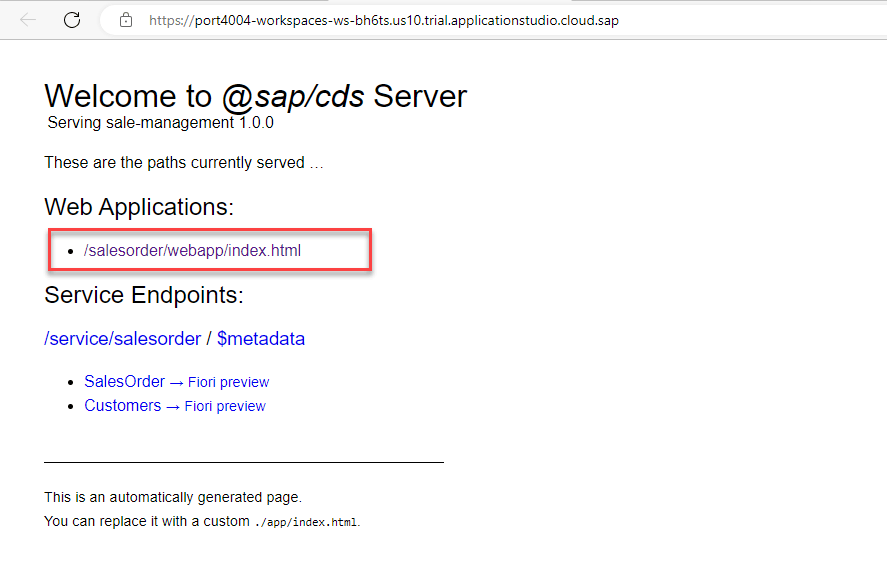
Run project : cds watch

CUSTOMIZING WITH EVENT HANDLING
In CAP model, beside standard funtionality, we can do some customize with entity. To do this, we use EVENT HANDLER.
Example, when we call ODATA GET from service, in CAP built-in event handler will be trigger READ event on entity.
In SalesOrder application, we need highlight sale order base on value of total amount like this

Add one field in entity SalesOrder

Add property Criticality in annotation

Create file JS in folder SRV with name same with service

// Imports
const cds = require("@sap/cds");
const { process_params } = require("express/lib/router");
/**
   * The service implementation with all service handlers
   */
module.exports = cds.service.impl(async function () {
    // Define constants for the SalesOrder entities from the salesorder-service.cds file
    const { SalesOrder } = this.entities;
    /**
    * Set criticality after a READ operation on /SalesOrder
    */
    this.after("READ", SalesOrder, (data) => {
        const sales = Array.isArray(data) ? data : [data];

        sales.forEach((sale) => {
            if (sale.TotalAmount < 1000000) {
                sale.Criticality = 1;
            }
            else if (sale.TotalAmount >= 1000000 && sale.TotalAmount <= 2000000) {
                sale.Criticality = 2;
            }
            else {
                sale.Criticality = 3;
            }
        });
    });

});
CONSUME REMOTE SERVICES FROM SAP S/4 HANA CLOUD
Sometime we need to call services from partner which we called EXTERNAL SERVICE. Example in SalesOrder Management, we need to update customer with service business partner on SAP backend.
In this session, we will learn about How to get API definition from SAP API Business Hub and import it into CAP project
GET SERVICE DEFINITION
Go to API Business Hub – S/4 HANA Cloud


ADD SERVICE TO CAP PROJECT
Create folder DOWNLOAD under folder srv in CAP Project and adrag file EDMX into this

Open terminal and run command: cds import ./srv/download/API_BUSINESS_PARTNER.edmx
After this command, CAP will be create folder external and 2 files EDMX and CSN.
And in file package.json auto generate code


Run project with cds watch

Open model schema.cds and add entity for business partner

using {  API_BUSINESS_PARTNER as bupa } from '../srv/external/API_BUSINESS_PARTNER';

 entity Suppliers as projection on bupa.A_BusinessPartner {
        key BusinessPartner as ID,
        BusinessPartnerFullName as fullName,
        BusinessPartnerIsBlocked as isBlocked,
}

CONNECT TO SERVICE ON SANDBOX
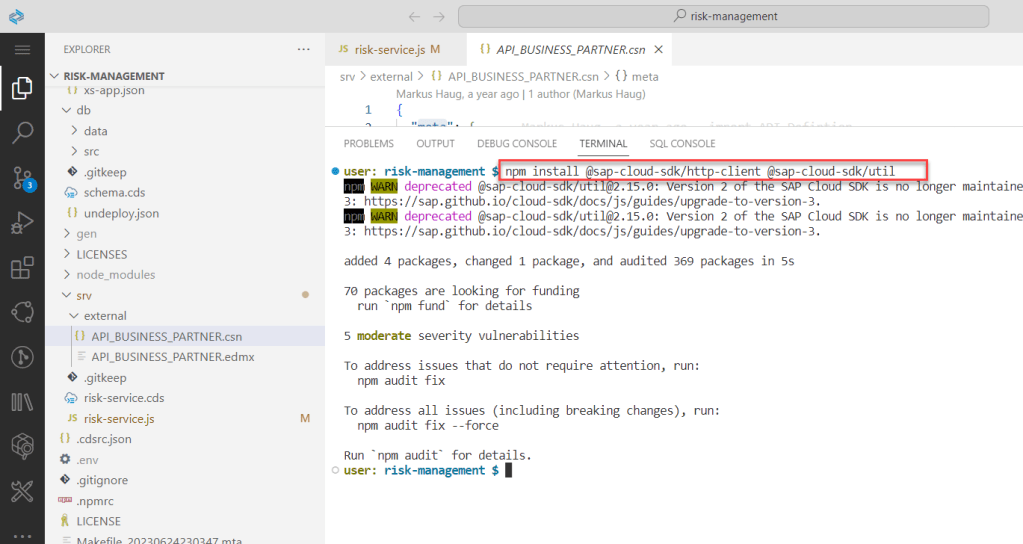
Install the node packages to mock the external services
Open terminal and run this command
npm install @sap-cloud-sdk/http-client @sap-cloud-sdk/util
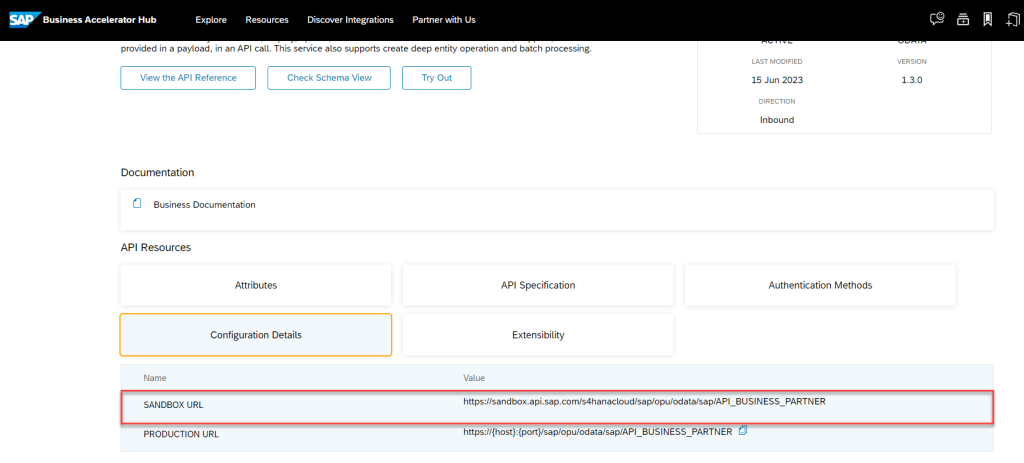
Copy URL on api business hub
Add configuration for connect external service into package JSON

  "cds": {
    "requires": {
      "API_BUSINESS_PARTNER": {
        "kind": "odata-v2",
        "model": "srv/external/API_BUSINESS_PARTNER",
        "credentials": {
          "url": "https://sandbox.api.sap.com/s4hanacloud/sap/opu/odata/sap/API_BUSINESS_PARTNER/"
        }
      }
    }
  }
Create API KEY
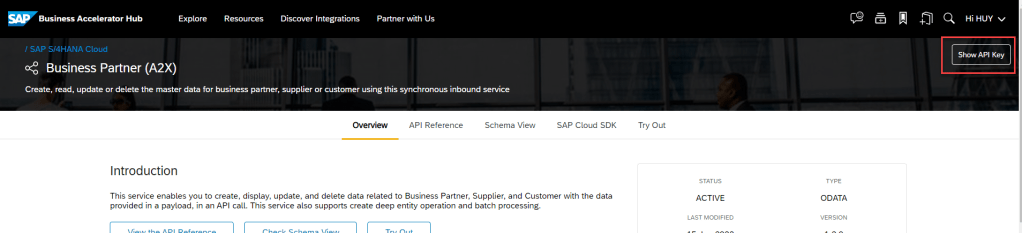
Create file .env in project
Copy API key in this
apikey=<APIKEY>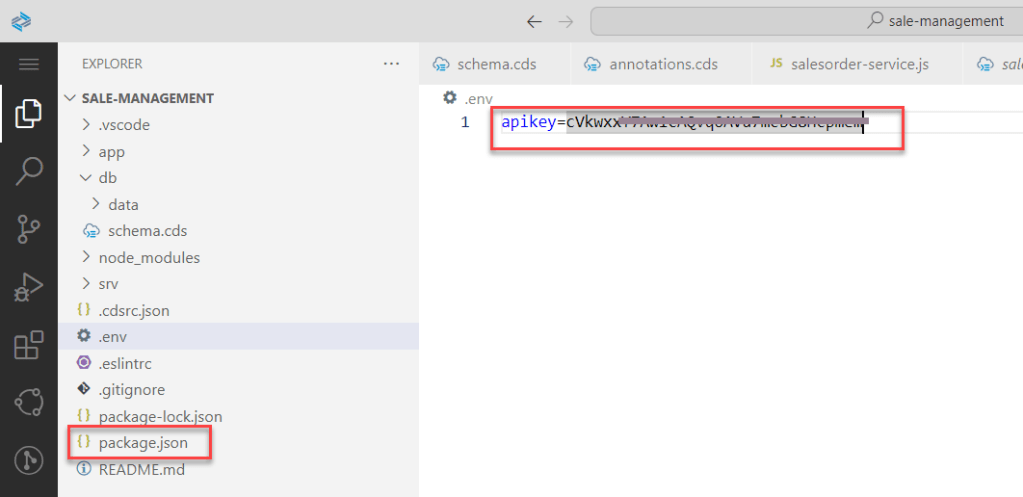
To consume external service, we have to add event READ handler in service.

 const { Suppliers } = this.entities;
    /**
        * * Event-handler for read-events on the BusinessPartners entity.
        * * Each request to the API Business Hub requires the apikey in the header.
        */
    this.on("READ", Suppliers, async (req) => {
        req.query.where("LastName <> '' and FirstName <> '' ");
        return await bupa.transaction(req).send({
            query: req.query,
            headers: {
               apikey: process.env.apikey
            }
         })
    })
Run project with cds watch


SUMMARY
In this articleI shared step by step to create User Inteface (UI) with annotation, how to use and organization annotaion file in CAP project, at last we add some Javascript code for customizing business logic base on business. Thanks for your reading and any advise kindly leave your comment on this.
Thanks.
Joseph.
