It’s great to see you again!
I was struggling to follow the SAP Help docs to set up the connection from SAP Datasphere to SAC SuccessFactors, so I’d like to take this chance to walk you through the steps in detail (^_^) Hope this helps!
Step 1: Allow DSP IPs in SF whitelist
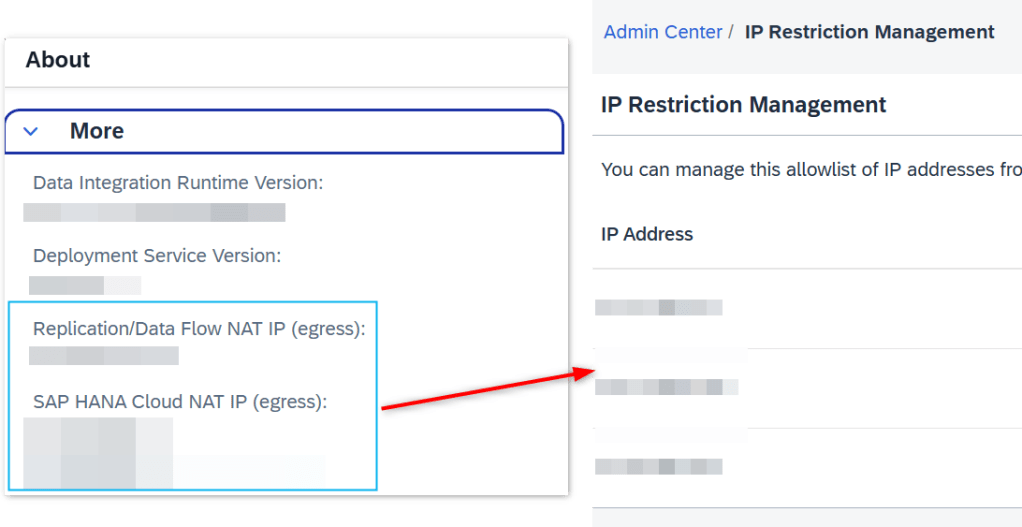
- Go to Datasphere tenant > Side panel > System > About
- Get SAP HANA Cloud NAT IP (egress) and Replication/Data Flow NAT IP (egress):
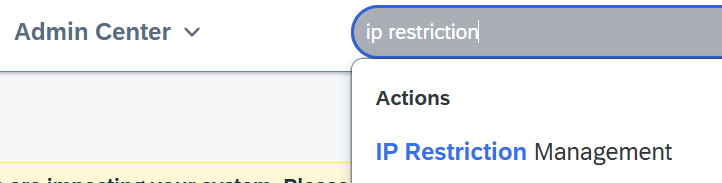
- Go to SF tenant > Type “IP restriction” > IP Restriction Management > Add IP Adress from step 2 to Whitelist
Step 2: Create Connection in SAP Datasphere
Go to SAP Dataspheren tenant > Connection > Select your space > Select SAP SuccessFactors
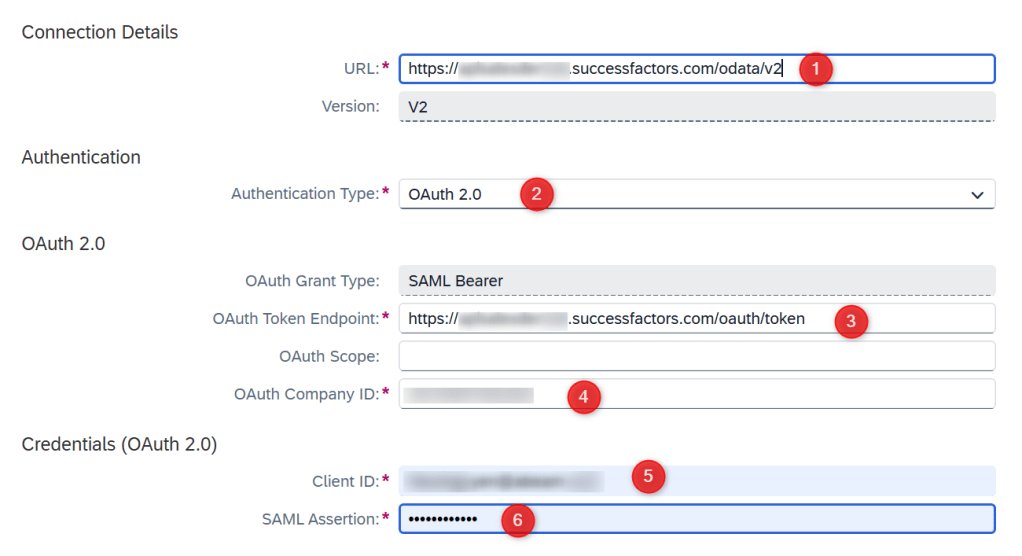
(1) URL
Navigate to this link:
https://help.sap.com/docs/SAP_SUCCESSFACTORS_PLATFORM/d599f15995d348a1b45ba5603e2aba9b/af2b8d5437494b12be88fe374eba75b6.html
Find your api tenant URL. For example my testing tenant is Sales Demo Environment:
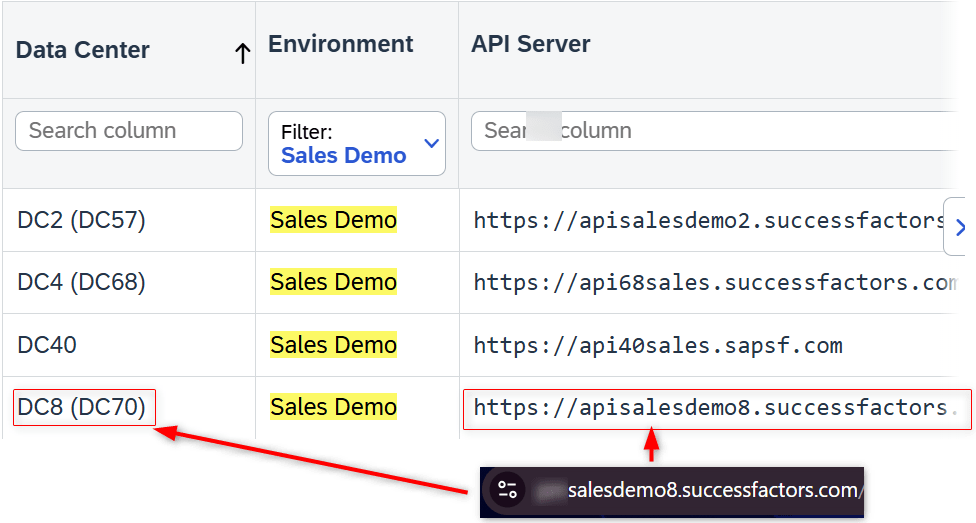
Add “/odata/v2” and input this API Server URL to (1)
(2) Authentication Type
Select OAuth 2.0
(3) OAuth Token Endpoint
Equal to (1) plus “/oauth/token“
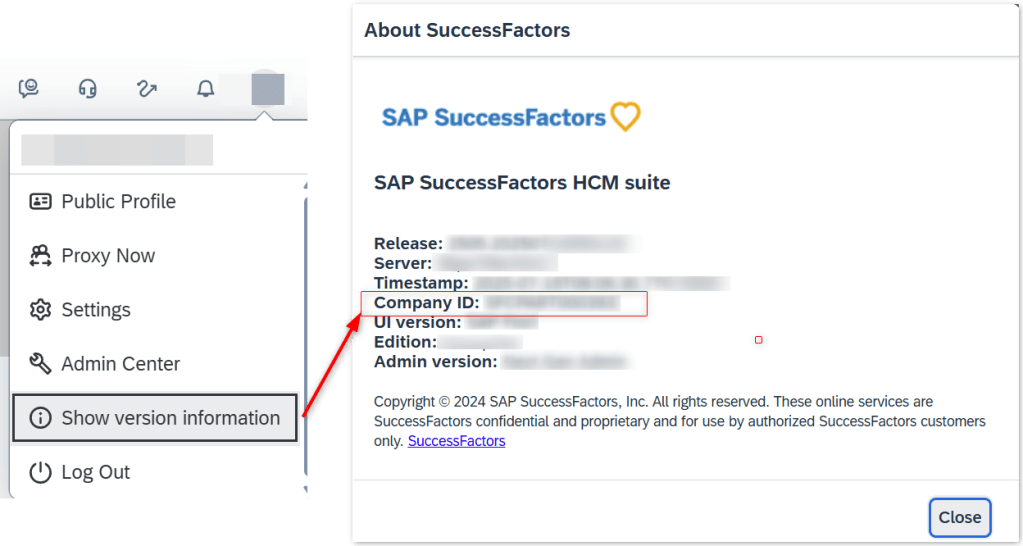
(4) OAuth Company ID:
Go to SF > Profile > Show Version Information > Copy Company ID
(5) Client ID
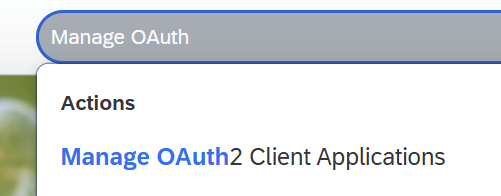
To get the Client ID, we need to register OAuth2 Client Application first.
Step 5.1: In SF search tab > search “Manage OAuth” > Manage OAuth2 Client Applications > Register a new Client
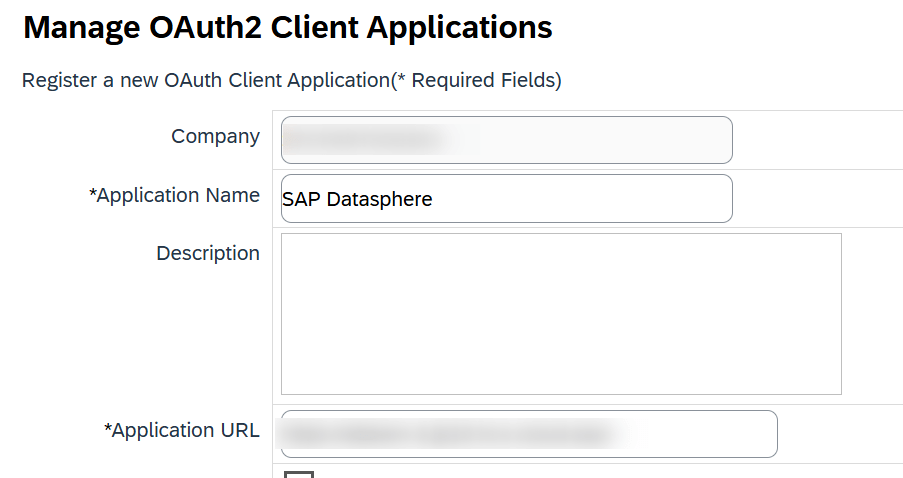
- Company ID: is the Company ID you get from (4)
- Application Name: [Free text] System name, in this case is Datasphere
- Application URL: Datasphere URL
Step 5.2: Scroll down and hit “Generate X.509 Ceritificate”
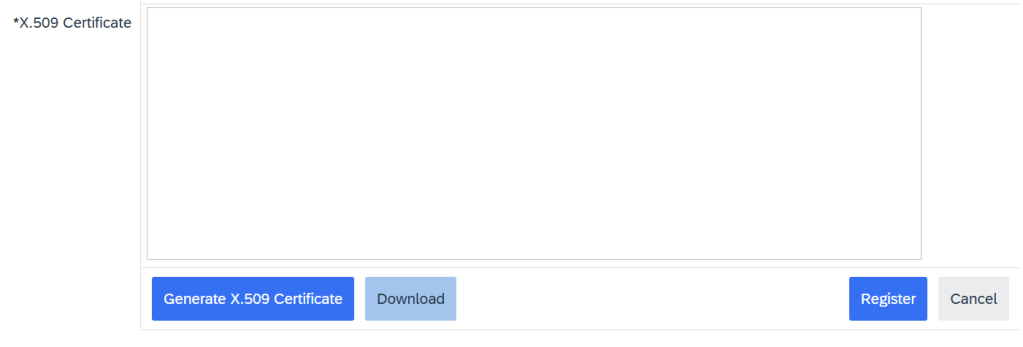
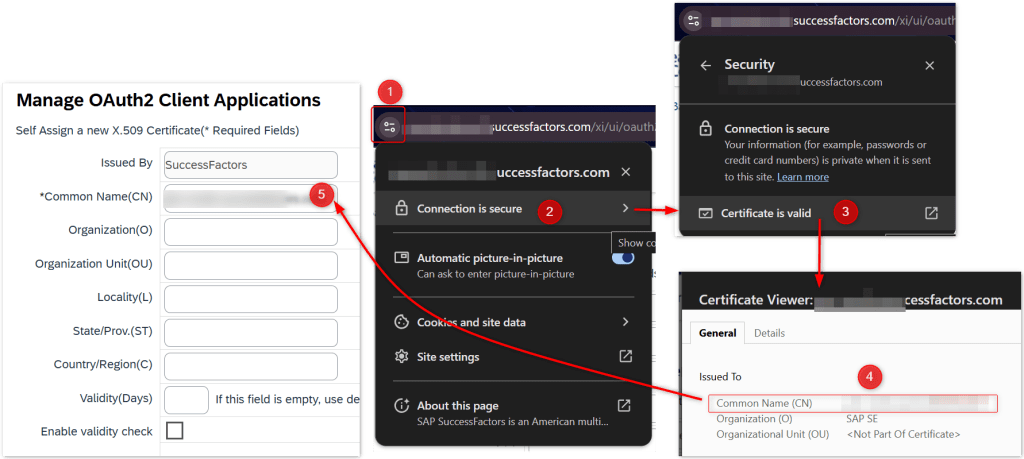
A screen popup ask to input Common Name:
Go to your SF tenant > on URL panel, select Certificate and copy Common Name > select Generate
Step 5.3: X.509 Certificate is generated > select Download button to download the X.509 certificate to local (file name: “Certificate.pem“)
> Save this for (6) SAML Assertion
> Select Generate
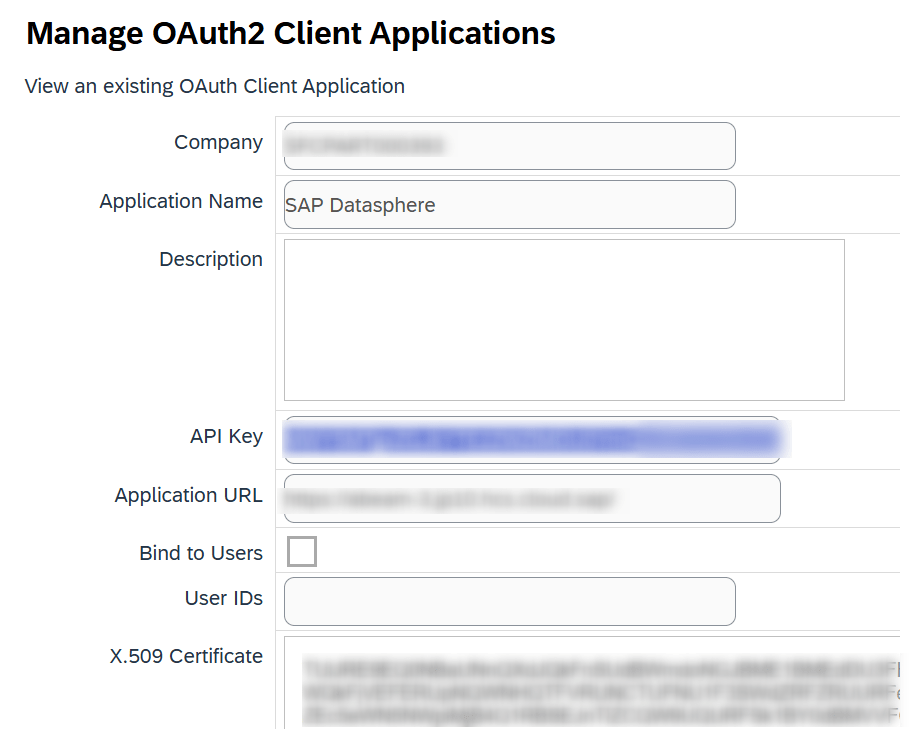
> View the Client you just created
> Copy API Key
> Paste to (5) Client ID in Datasphere connection setup
(6) SAML Assertion
Step 6.1: From step 5.3 > Open this file via NotePad > You will see the Private Key, save this for step 6.3.
Step 6.2: Follow this SAP Note https://me.sap.com/notes/3031657 to generate SAML Assertion
- Download SAP MAchine https://sap.github.io/SapMachine/#download and install it on C Driver
- Download MAVEN file https://maven.apache.org/download.cgi and upzip to C Driver

SETUP ENVIRONMENT VARIABLES
Go to Start > Search Environment > Edit environment variables for your account

- At System Variables, ensure JAVA_HOME variable is set and points to the path of your JDK installation
- At User Variables, click on new and set the path of the “bin“ folder (from your JDK installation folders) to the variable “PATH“ as shown below:

VALIDATING JDK INSTALLATION
- Go to Command Prompt and execute the command below:
echo %JAVA_HOME% - If it prints the folder path of the JDK installation, it means the installation was successful:

VALIDATING MAVEN INSTALLATION
Open the Command Prompt point to “bin“ folder of Maven installation and execute the command below:
mvn -v
This means Maven installation is successful.

Step 6.3: Generating SAML Assertion
Download the SAMLAssertion.properties file in SAP Note > Unzip > Go to the folder and open “SAMLAssertion.properties” file: 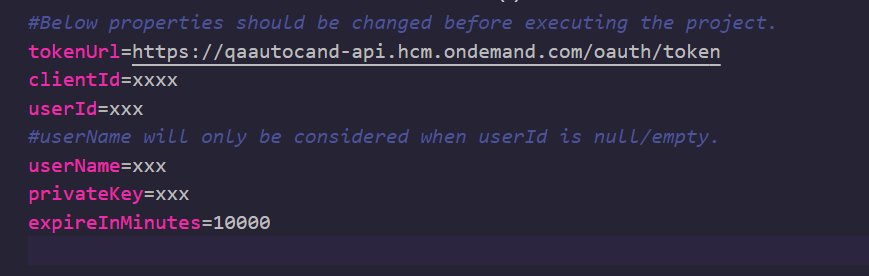
- tokenUrl: Equal to your OAuth Token Endpoint (3)
- clientID: Go to SF > Manage OAuth2 Client > View your register OAuth2 Client > Copy the API Key, equal to (5) Client ID
- userName : your SF account name
- PrivateKey: X509 private key (Private key from Certification.pem – result from step 5.3)
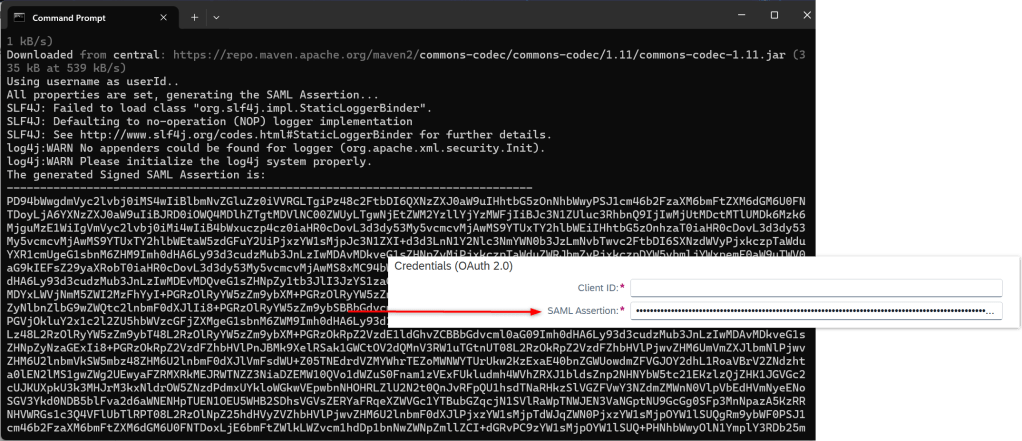
Open command prompt > point to folder of SAMLAssertion.properties file using cd > Run this command: mvn compile exec:java -Dexec.args=”SAMLAssertion.properties”
If you see the BUILD SUCCESS > copy the generated Signed SAML Assertion into SAP Datasphere (6) SAML Assertion
Now you are ready to create connection and pull data directly from SF.
Pulling data from SAP SuccessFactors in SAP Datasphere
Go to SAP Datasphere > Data Builder > Import Remote Tables > Select SF Connection > Next Step
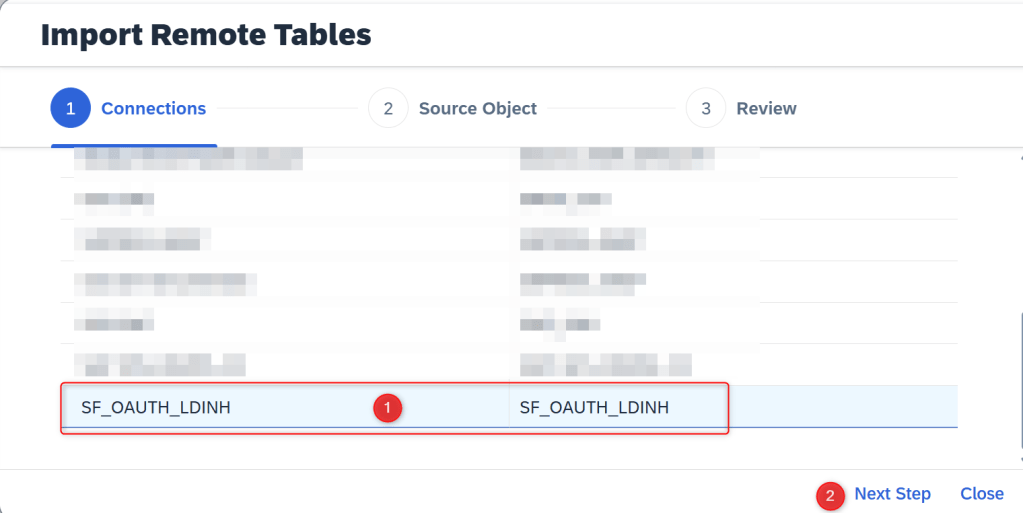
Search your SF object > Tick the object > Import and Deploy:
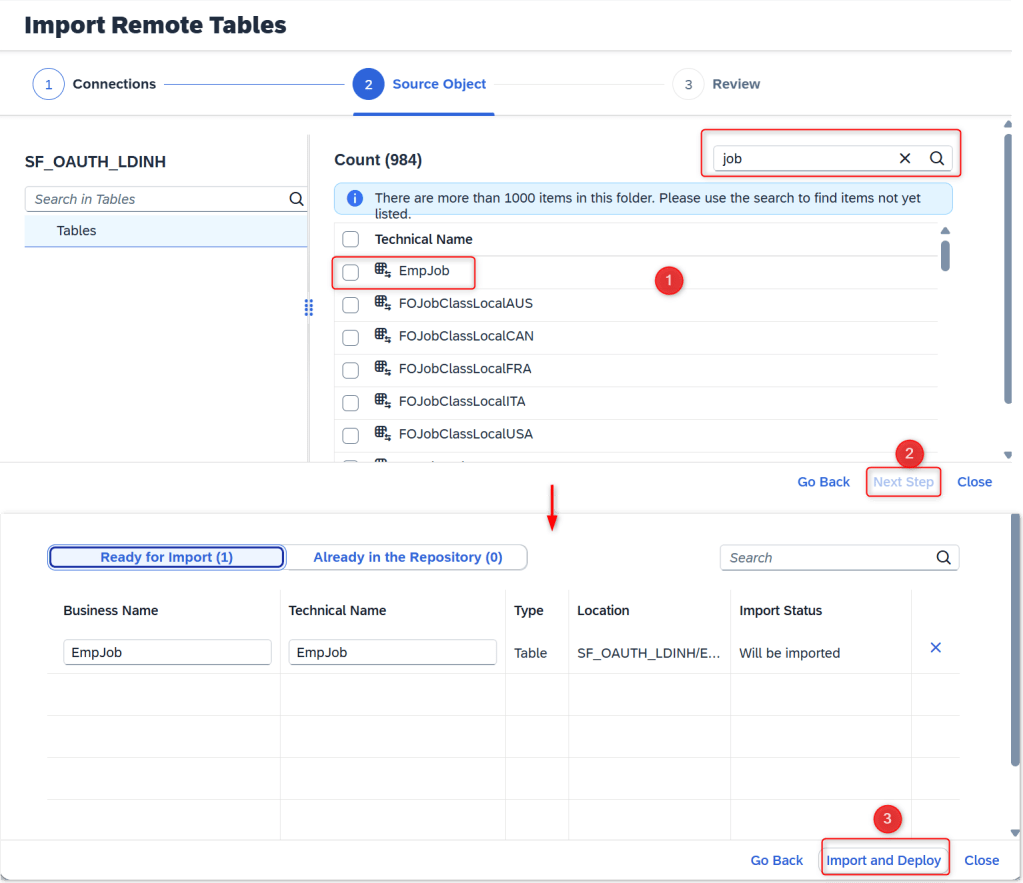
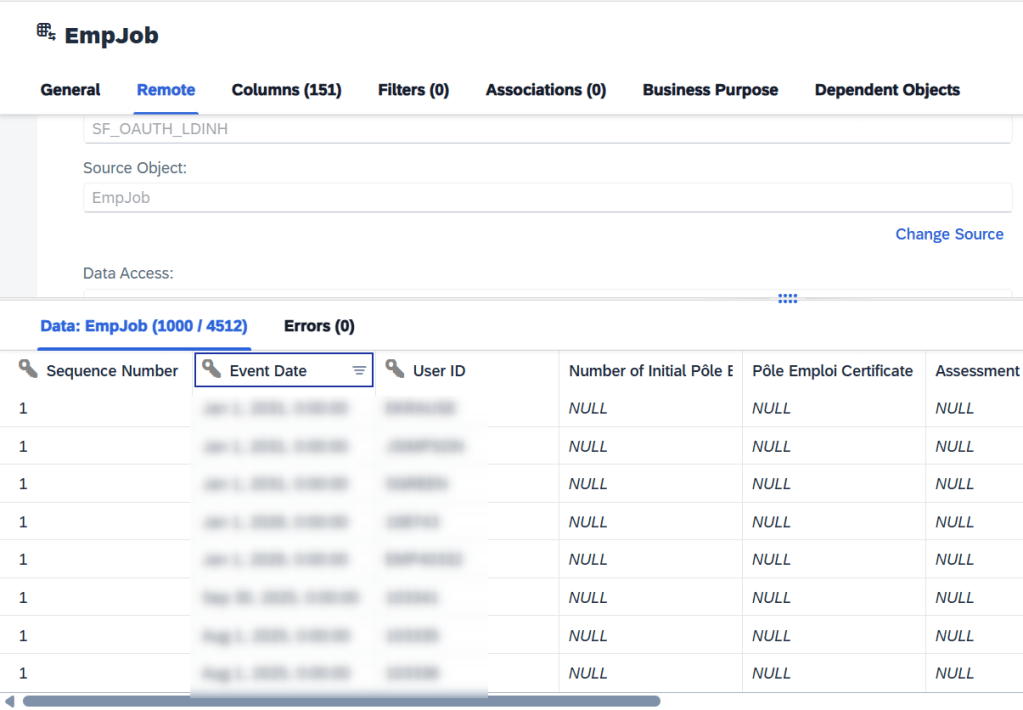
SF data is ready for modeling in SAP Datasphere:
Conclusion
I hope this explanation save a bit of your time in the process of setting up connection to SAP SuccessFactors from SAP Datasphere. Please feel free to leave comments, thank you for your precious time.
See you next time (^_^)
