Hi guys, I this article I want to share my understand about Transport in CPI. Every time we configure and design integration is done, we need transport it from tenant to another tenant.
This can be achieve using Content Agent Service which will acts like an agent that allows to assemble the SAP CPI content and export it to transport queue.
But we cannot transport from CF foundry to NEO environment.
We have four ways to transport package
- CTS+
- Transport Management Service
- MTAR download
- Manual Export and Import
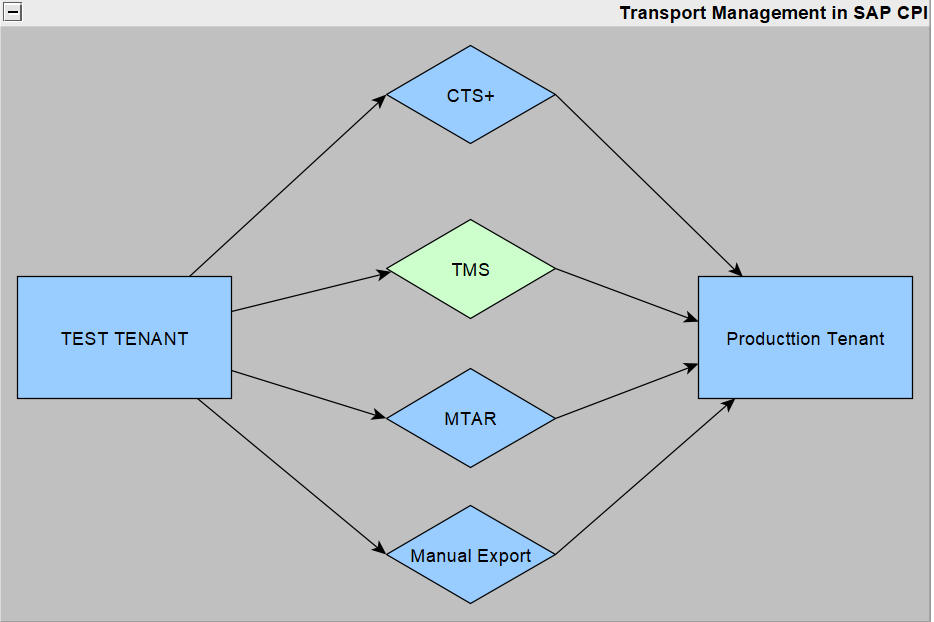
First, let view landscape of transport package

Next, let view flow transport by using Content Agent Service (CAS) and Transport Management Service (TMS)
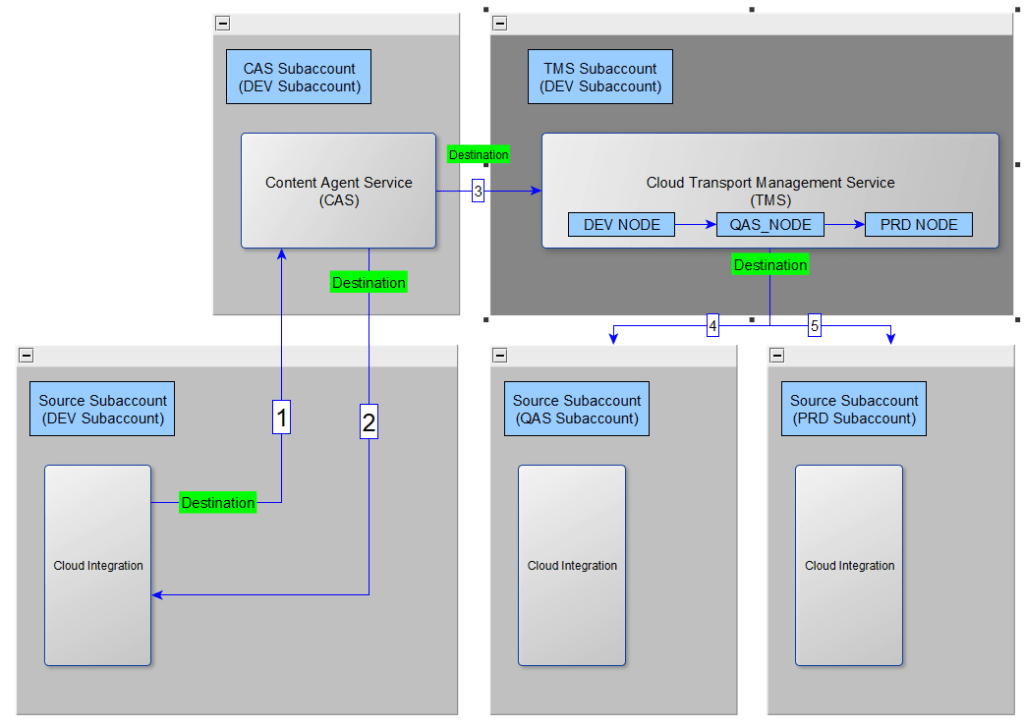
In this article, I will talk about one type of transport. It is TMS – Transport Management Service
Pre-requisites:
- Two separate SAP CPI tenants.(They will act as source and Target tenant)
- Subscription and admin access to SAP CPI Transport Management Service.
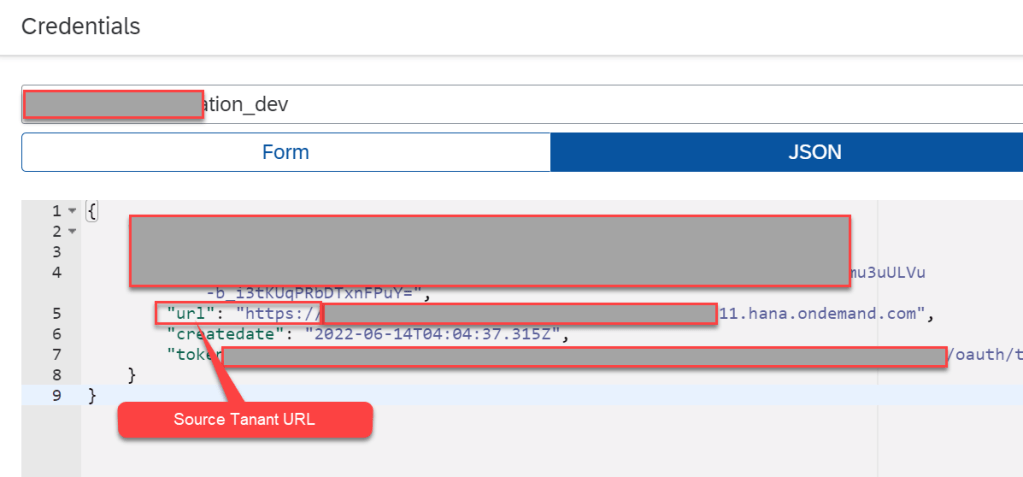
- Sample integration content to for transport from source to target.
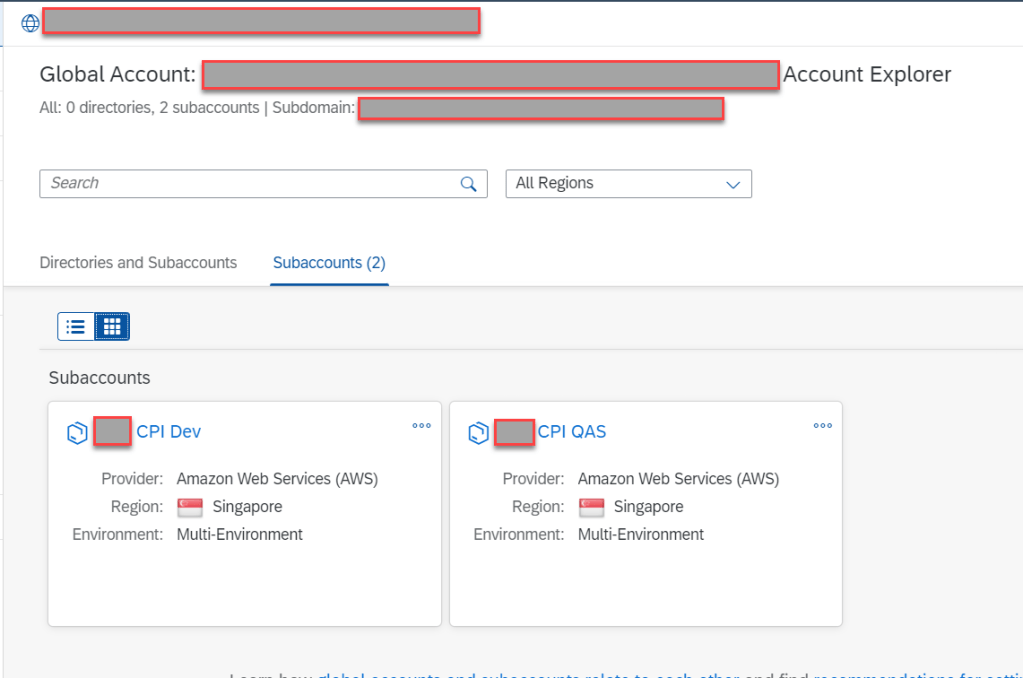
Step 1 : Create two Tenant
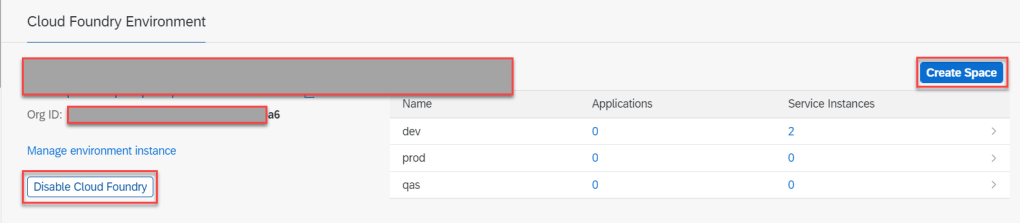
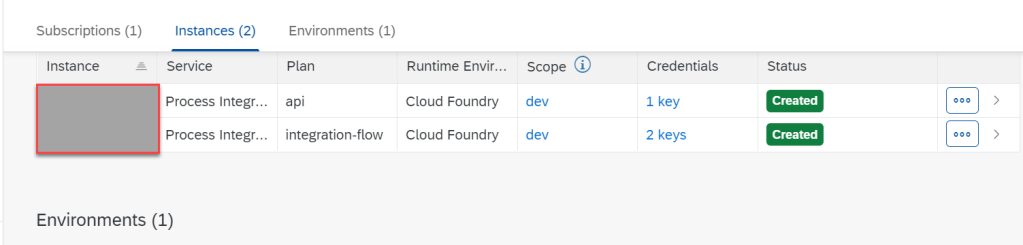
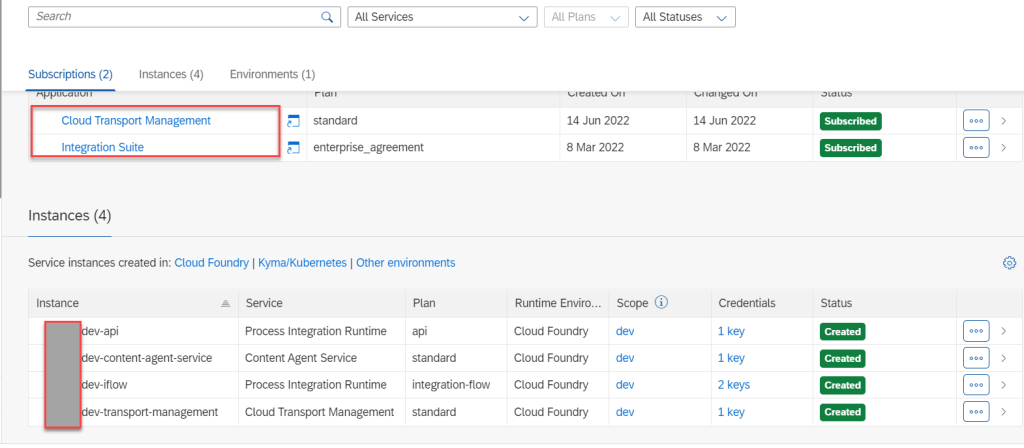
Step 2 : Enable Cloud Foundry, create space, create Application Integration Suite and Instance Process Integration Runtime with Plan API and integration-flow for every Tenant

Step 3 Create application Cloud Transport Management
- This step configure at Source Subaccount
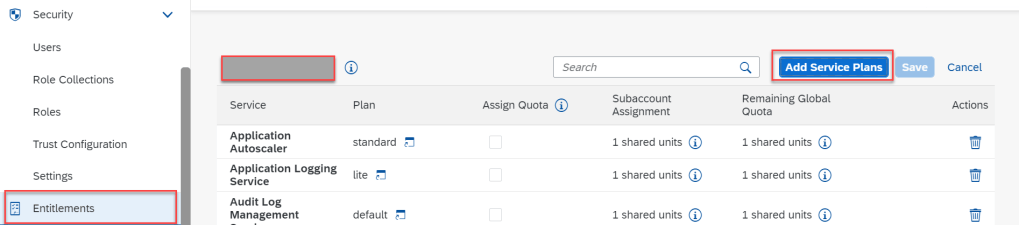
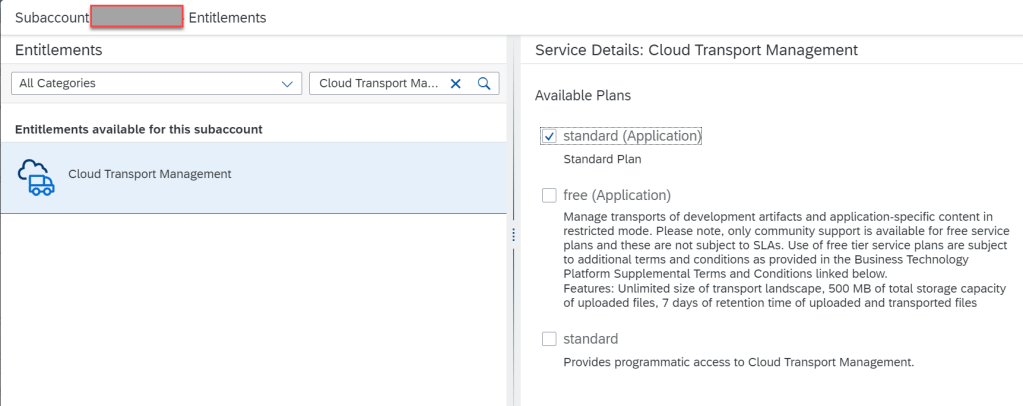
Step 3.1: Add Service Plans
Go to Subaccount
Go to Entitlements
Add Services Plan
Search : Cloud Transport Management
Step 3.2 Create Application
- Go to Services and Market Place
- Search : Cloud Transport Management
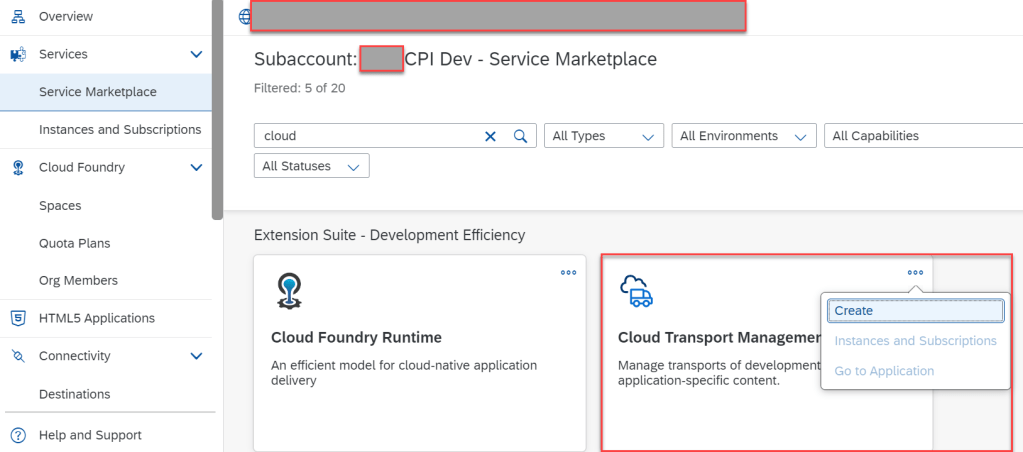
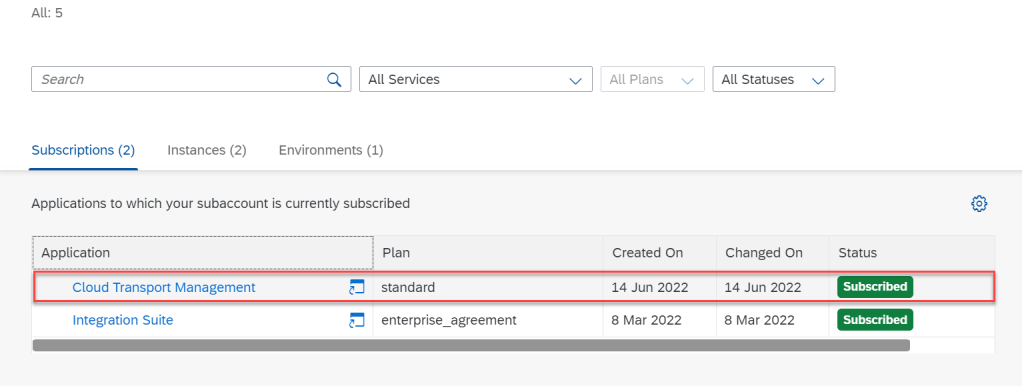
After done we have
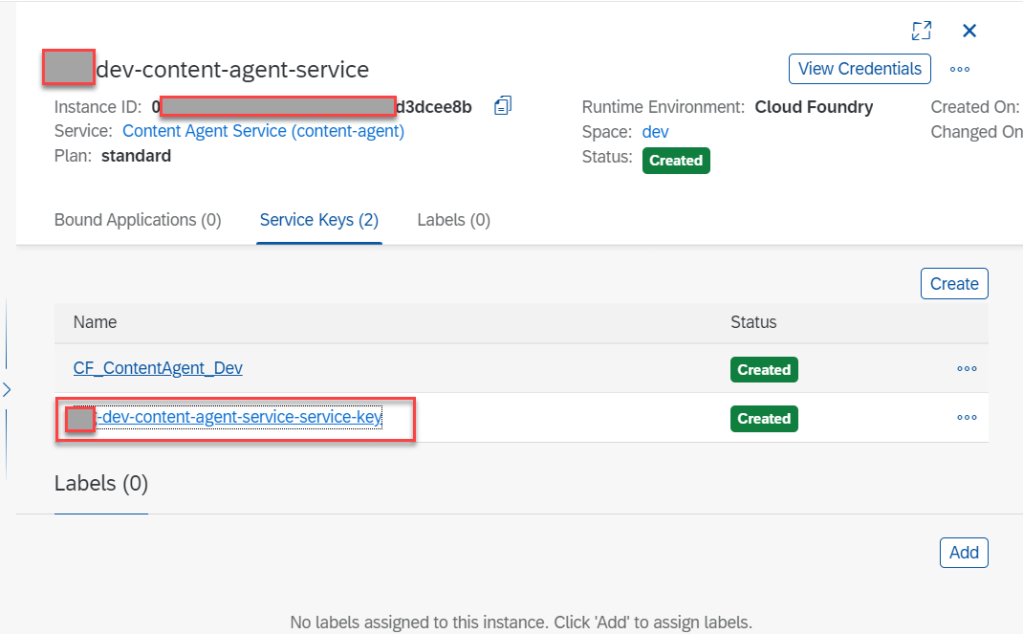
Step 5 Create Instance Content Agent Service and Service Key
- This step configure at Source Tenant
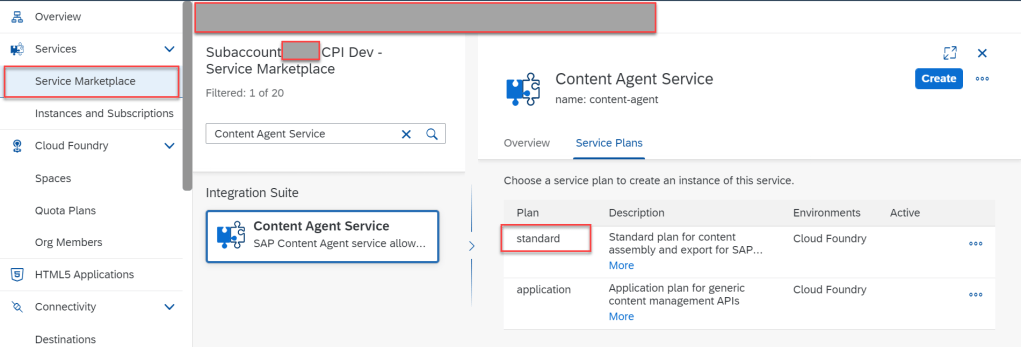
5.1 Create Instance
- Go to Services And Market Place
- Search Content Agent Service
- Create

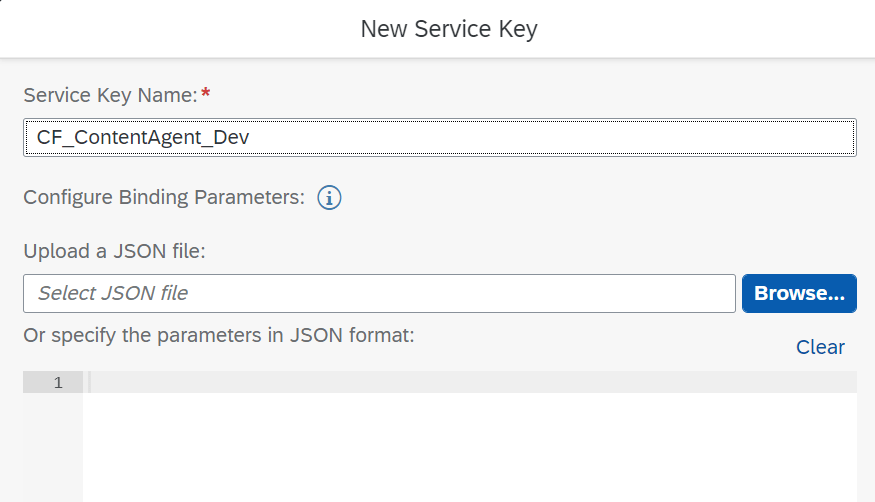
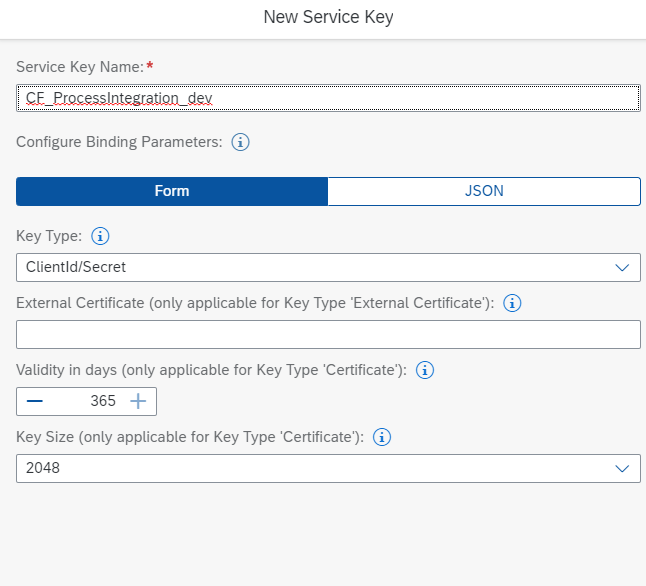
5.2 Create service key.
- This key will be using in configure destination step.
Step 5 : Create Instance Process Integration Runtime with plan API and Service Key
- This step configure at Source Subaccount
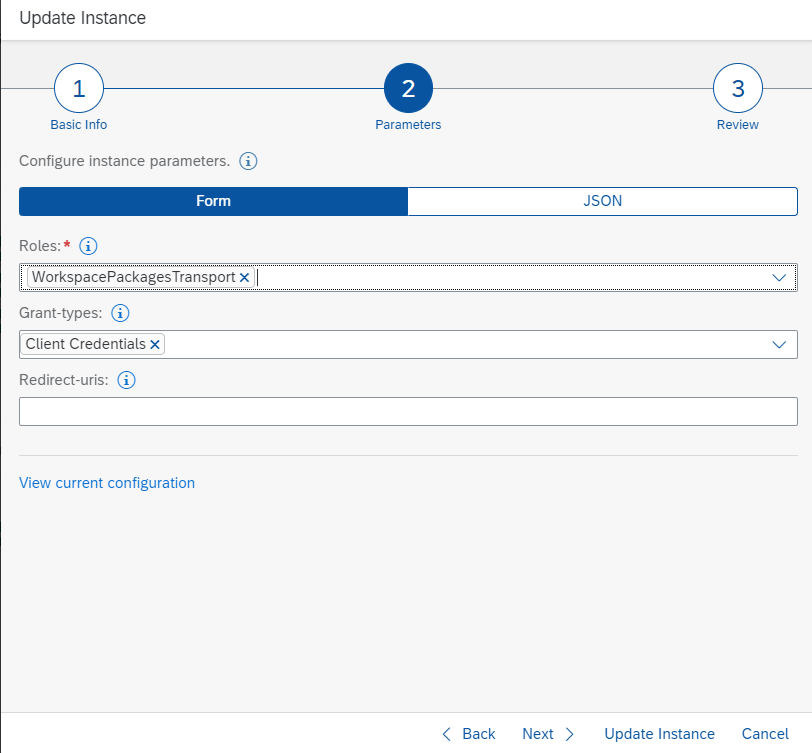
5.1 Create instance Process Integration Runtime with plan API
- Go to Service and Market places
- Search : Process Integration Runtime
- Create
- Choose Plane : API

Note : This config use ROLE : WorkspacePackagesTransport
5.2 Create Service Key
- This key will be using in configure destination step.
Step 6 : Create Instance Cloud Transport Management and Service Key
- This step configure at Source Subaccount
6.1 Create Instance Cloud Transport Management with plan standard
- Go To Instance and subscriptions
- Cloud Transport Management
- Create

6.2 Create service key
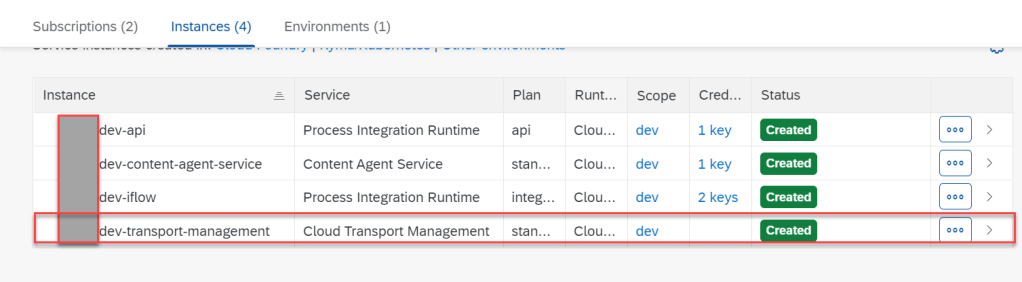
OK, after 6 steps above, we configured all application and instances which need for Transport using TMS.
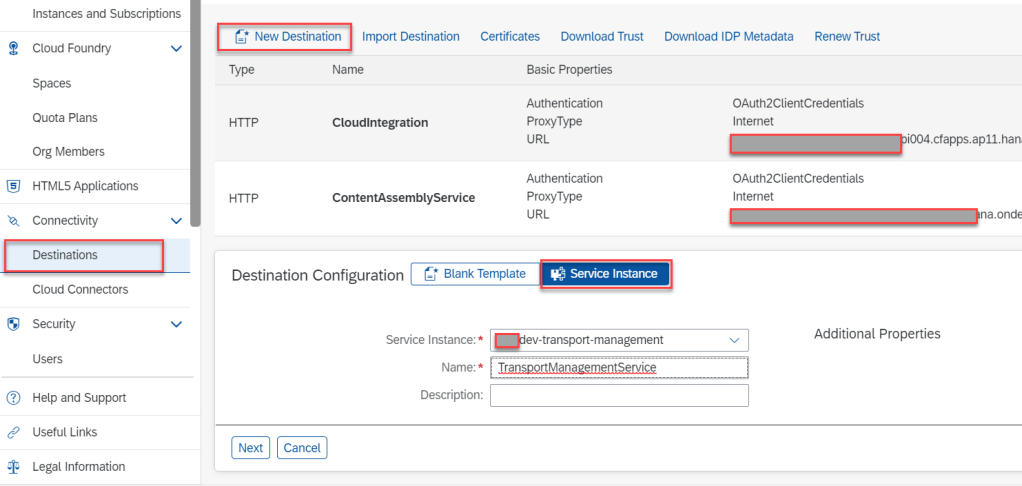
Step 7 Create destination
- This step configured at source Subaccount
Go to Destination at menu
Click New Destination
Choose Service Instance
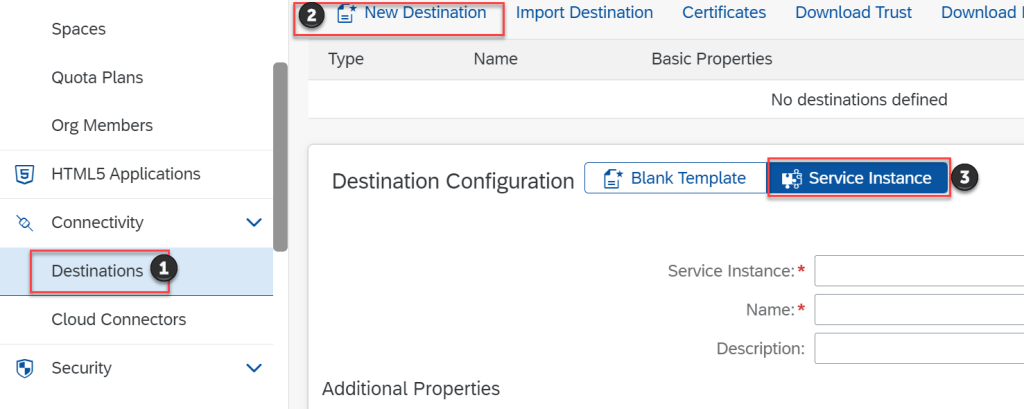
- (1) : Service Instance : Choose service instance of Content Agent Service (Step 5.1)
- (2) : Name : ContentAssemblyService (Exactly name case sensittive)
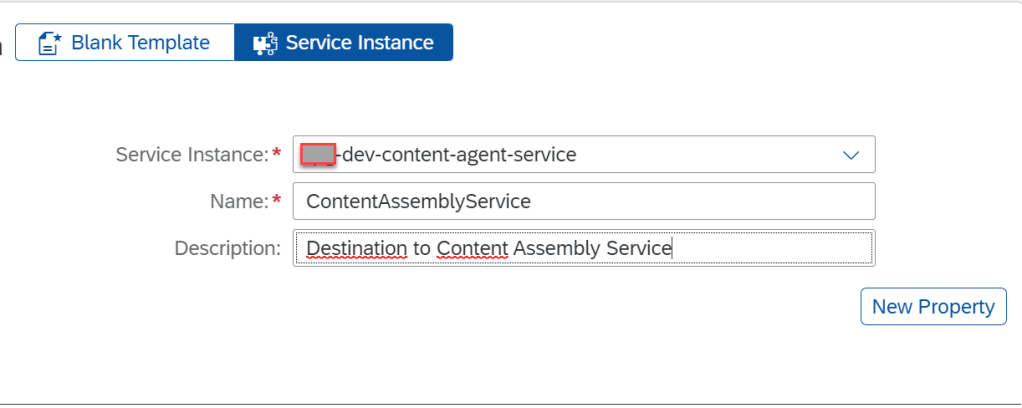
- Next, System will fill data automatically
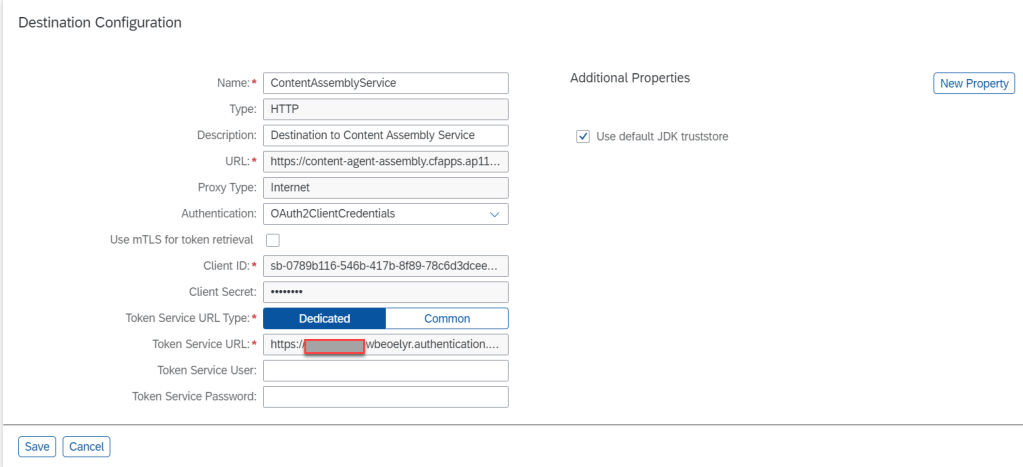
- Save
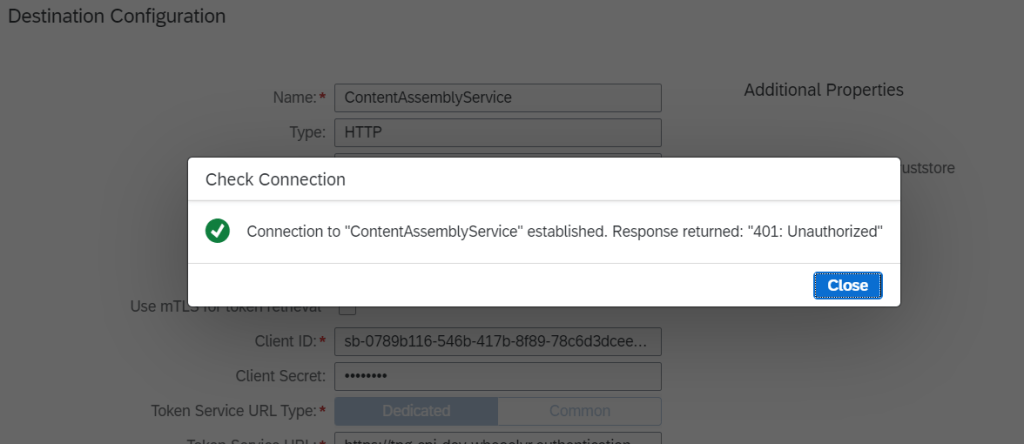
- Check Connection
In this time, SAP BTP will create one more service key for Instance Content Agent Service
Step 8 Create destination CloudIntegration
- This step configured at source Subaccount
Go to Destination at menu
Click New Destination
Choose Bank Template

- Name : Exactly is CloudIntegration
- Type : HTTP
- Description : <Any>
- URL : <SourceTenantUrl>/api/1.0/transportmodule/Transport
- Client ID : Get in instance Process Integration with Plan API ( Step 2 )
- Client Secret : Get in instance Process Integration with Plan API ( Step 2 )
- Token Service URL : Get in instance Process Integration with Plan API ( Step 2 )
- Save
- Check Connection

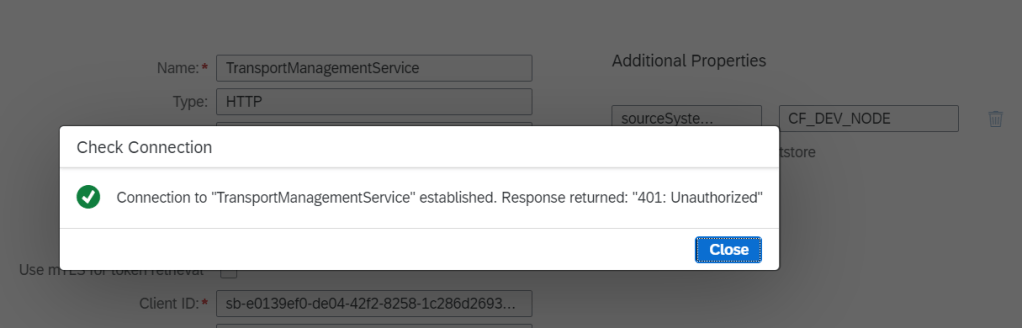
Step 9 : Create destination TransportManagementService
- This step configured at source Subaccount
Go to Destination
Click New Destination
Tab Service Instance
- Service Instance : Choose name instance of service Cloud Transport Management in step 6
SAP BTP will be fill information automatically. Create new properties by config in section Additional Properties
- Key : sourceSystemId
- Value : CF_DEV_NODE ( this node will configured in later step. Do not worry) => Step 12.1
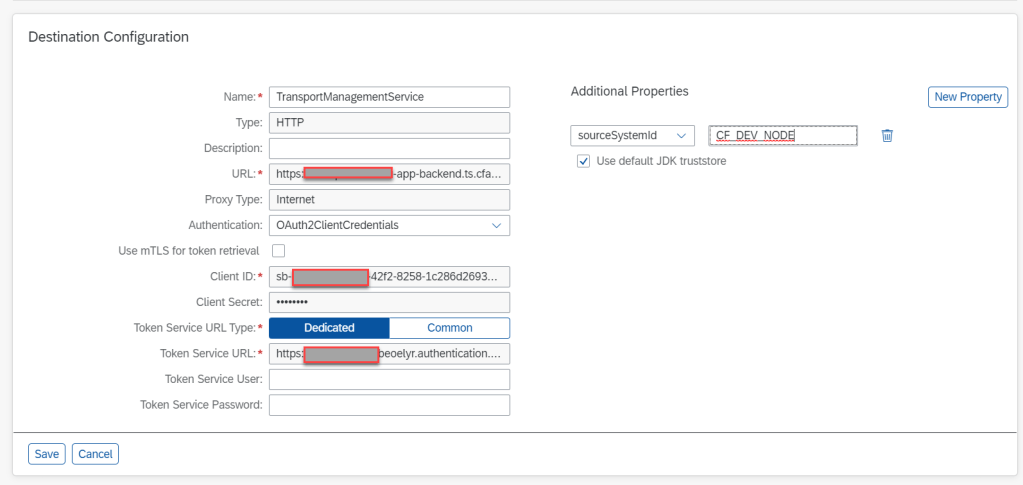
- Save
- Check Connection
Step 10 Create destination for target tenant at Source Tenant
- This step configured at source tenant
Go to Destination
New Destination
Blank Template
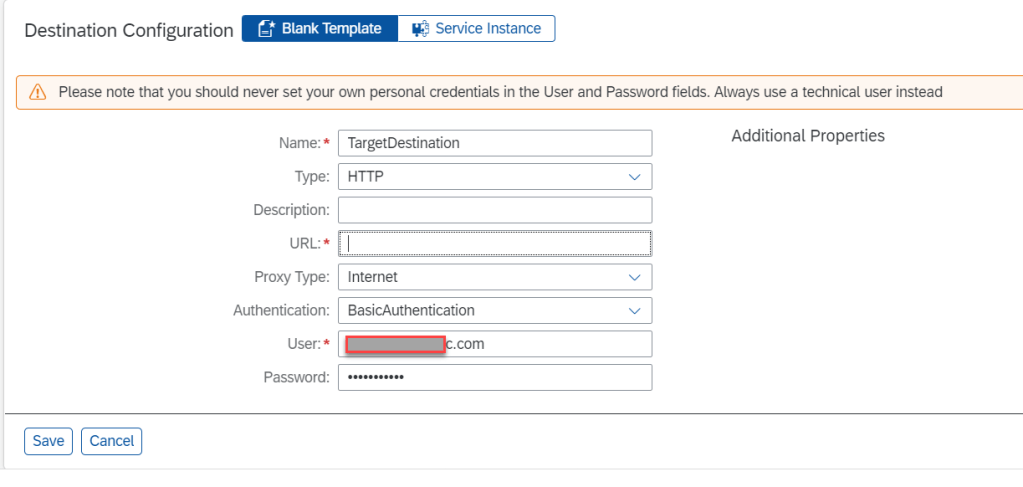
- Name : TargetDestination
- Type : HTTP
- Description : <Any>
- URL : https://deploy-service.cfapps.<Region of Target subaccount>.hana.ondemand.com/slprot/<OrgNameOfTarget>/<SpaceNameOfTarget>/slp
- User : User ID ( Or Email)
- Pass : Password
- Authentication : Basic Authentication
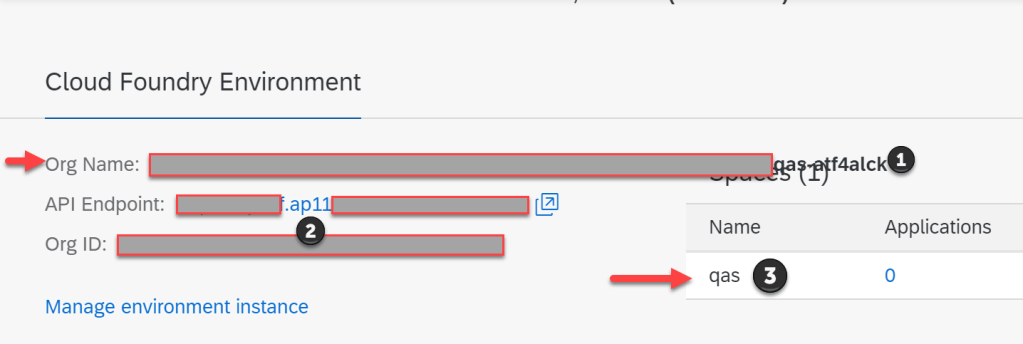
- (1) : OrgNameOfTarget
- (2) : Region of Target subaccount
- (3) : SpaceNameOfTarget
NOTE : Org Name Of Target can not have white space. If exist white space in here, although Connection destination response OK when check connection, We also receive Issue NOT FOUND as
Exception during start of deployment for deploy type ‘SLP_CTS’: Error during deployment initialization: Not Found
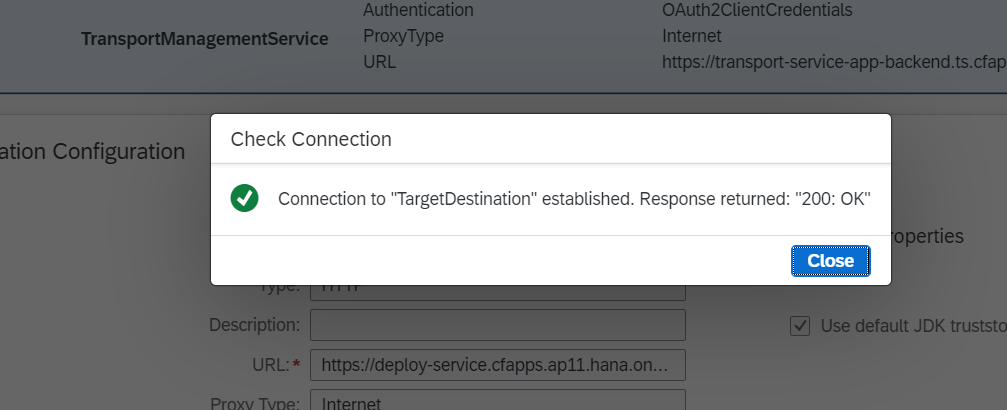
Save
Check Connection
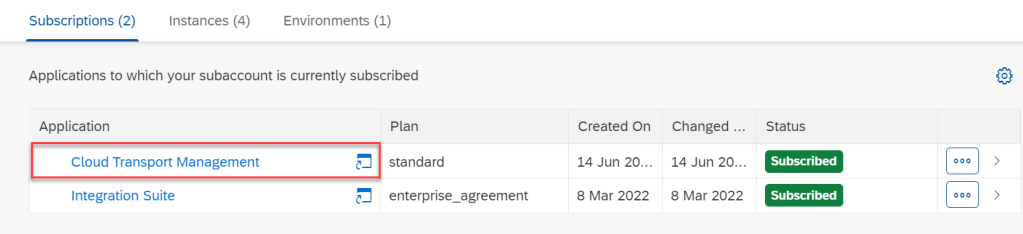
Ok, We configured all destination. Next we will configured application Transport Management System. Go to this application Cloud Transport Management
Because of you do not have permission, you will receive this screen
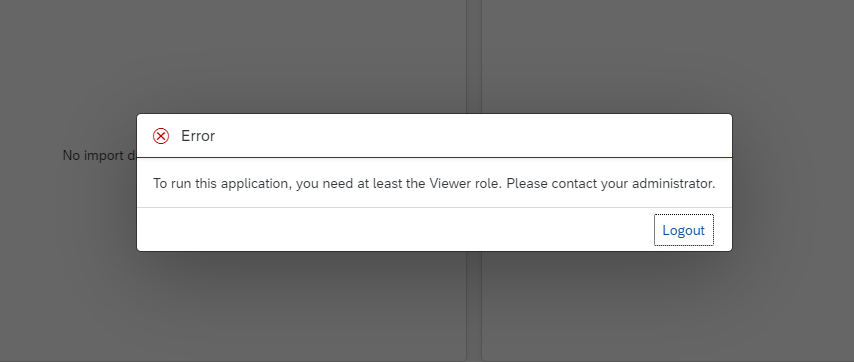
Step 11 : Assign ROLE to configure TMS for user
11.1 : ROLE to run application Cloud Transport Management
- Administrator
- Landscape Operator
11.2 : ROLE to config transport
- AuthGroup_Administrator
- WorkspacePAckages_Transport

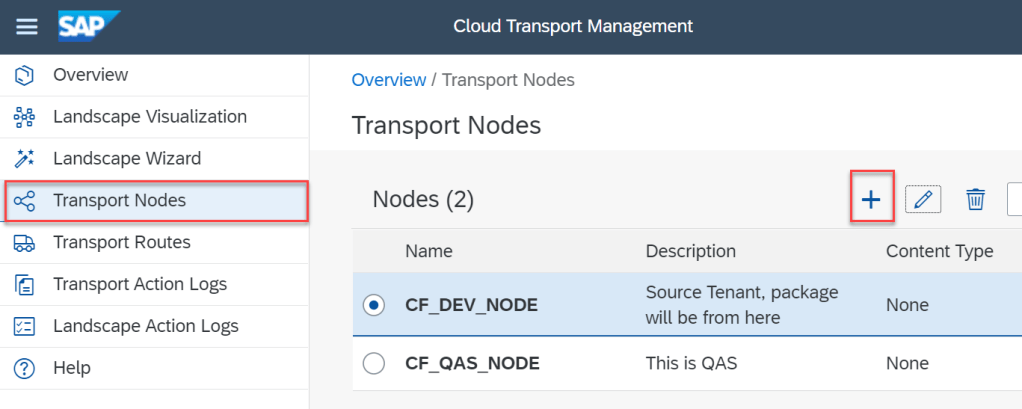
Step 12 : Configure TMS
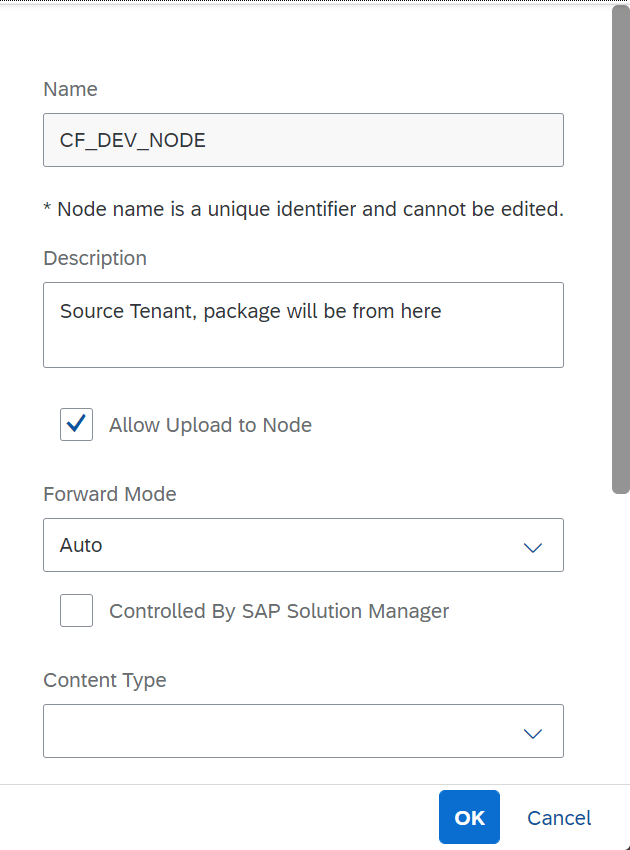
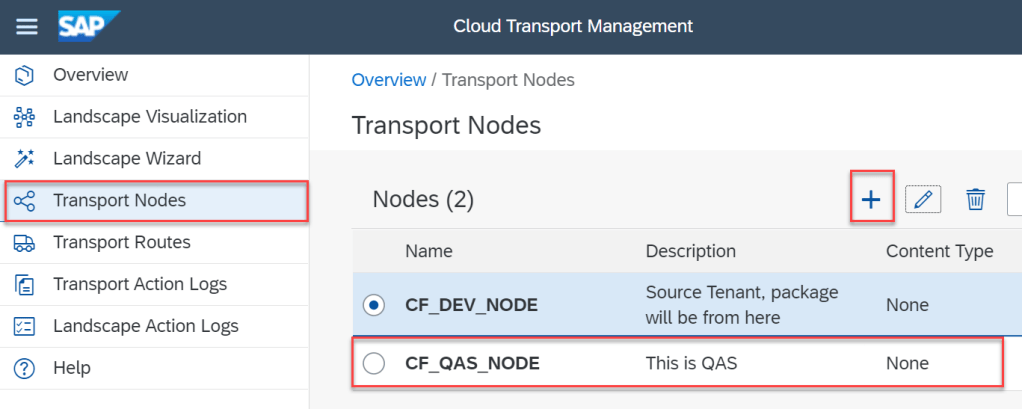
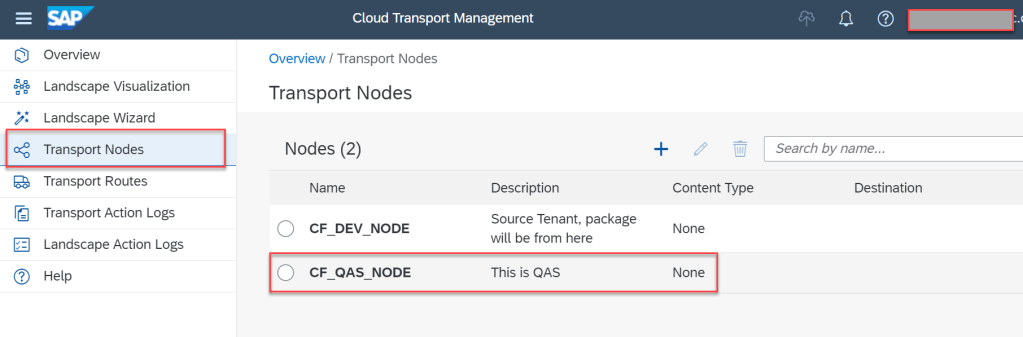
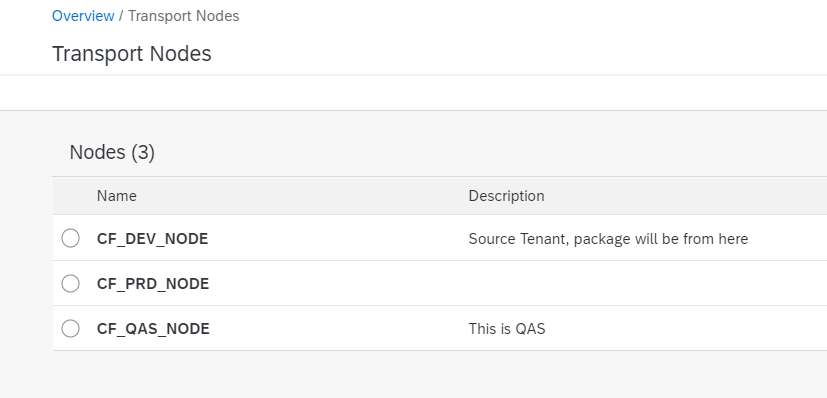
12.1 Create source transport node
- Go to Transport Nodes
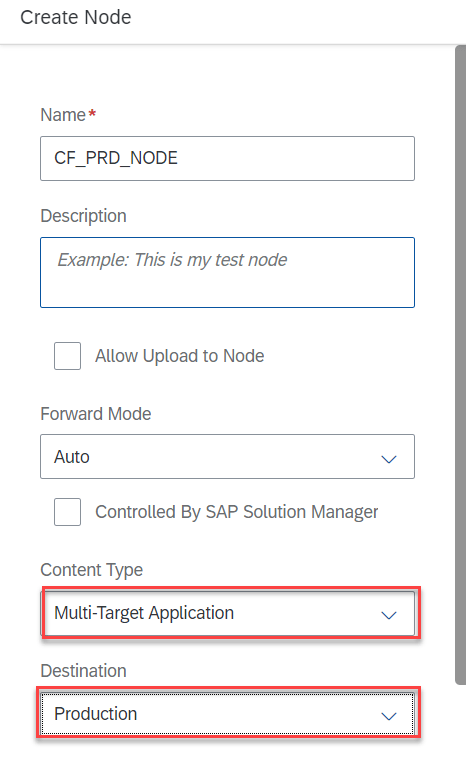
12.2 Create destination transport node

- Content-Type : Multi-Target Application
- Destination : <Choose destination in Step 10>
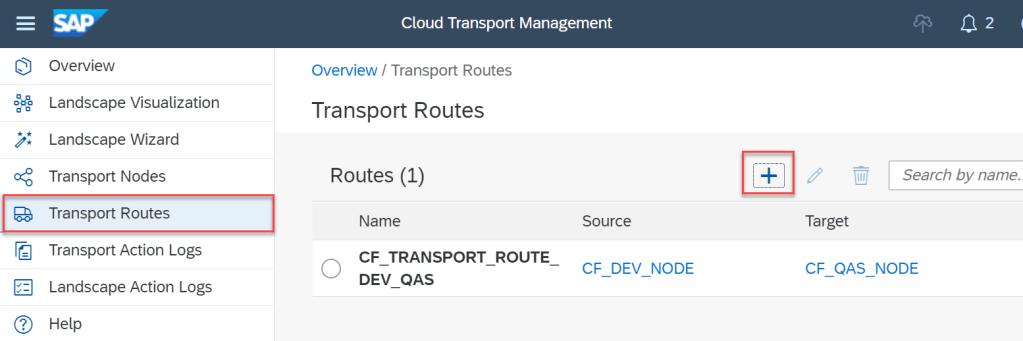
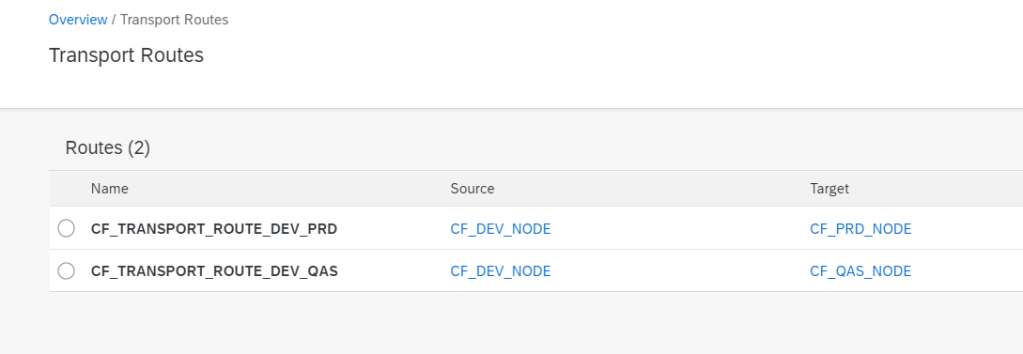
12.3 Create Transport Routes
- Go to Transport Routes
- Create New
12.4 Configuration Transport Mode in Integration Suite Application
- Go to Integration Suite application
- Go to Design, Develop and Operate Integration scenarios
- Go to Tenant Setting
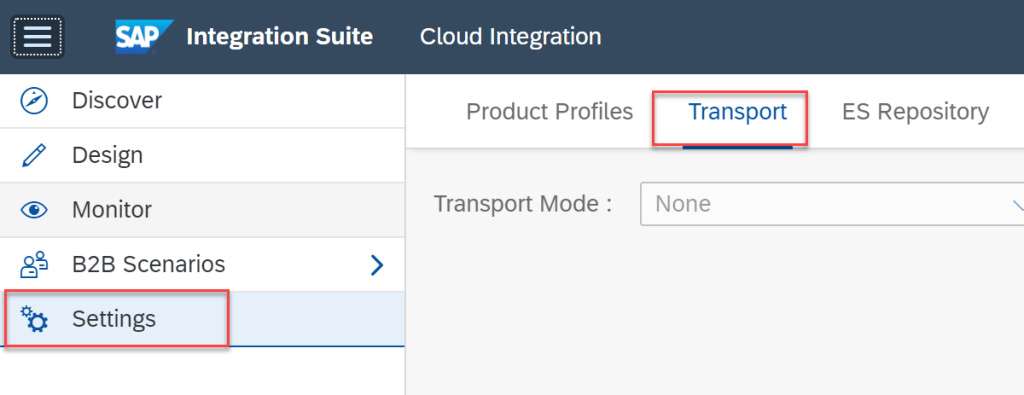
- Edit
- Choose Transport Management Service
- Save
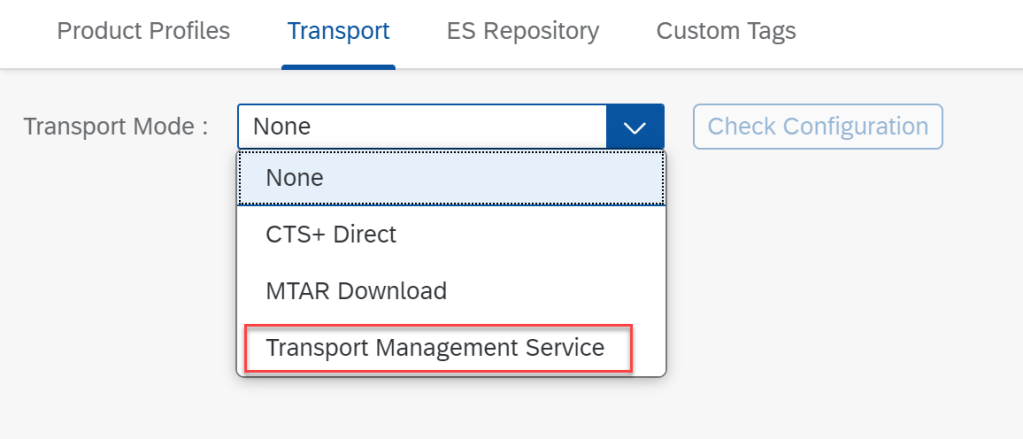
- Check Configuration
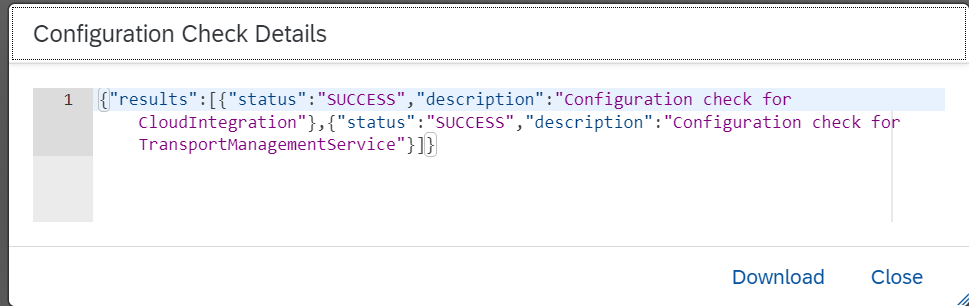
OK, Congratulation ! We have already done configured. Next, We will try by transport some package to QAS tenant.
Step 13 : TEST CASE
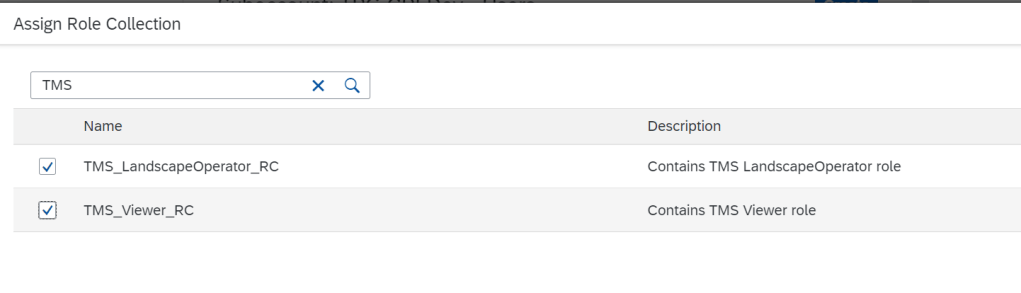
13.1 Assign ROLE WorkspaceTransportPackage for user
- Create new Role Collection. Example ZTMS_RoleCollection
- Add Role WorkspacePackagesTransport for this Role Collection
- Assign this Role Collection to User
- Log-Off
- Log-On
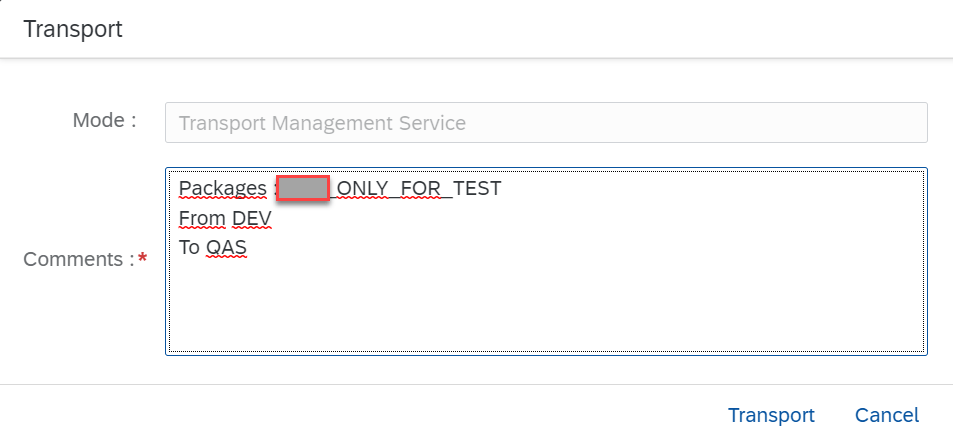
13.2 Create TR
- Go to package which need transport to QAS
- Click Transport link


13.3 Review and transport TR in Cloud Transport Management Application
- Go to Service and Subscription
- Go to Cloud Transport Management Application
- Go to Transport Nodes
- Go to Destination Node

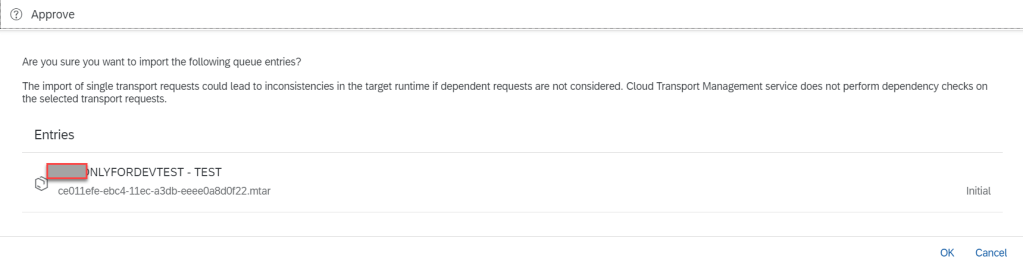
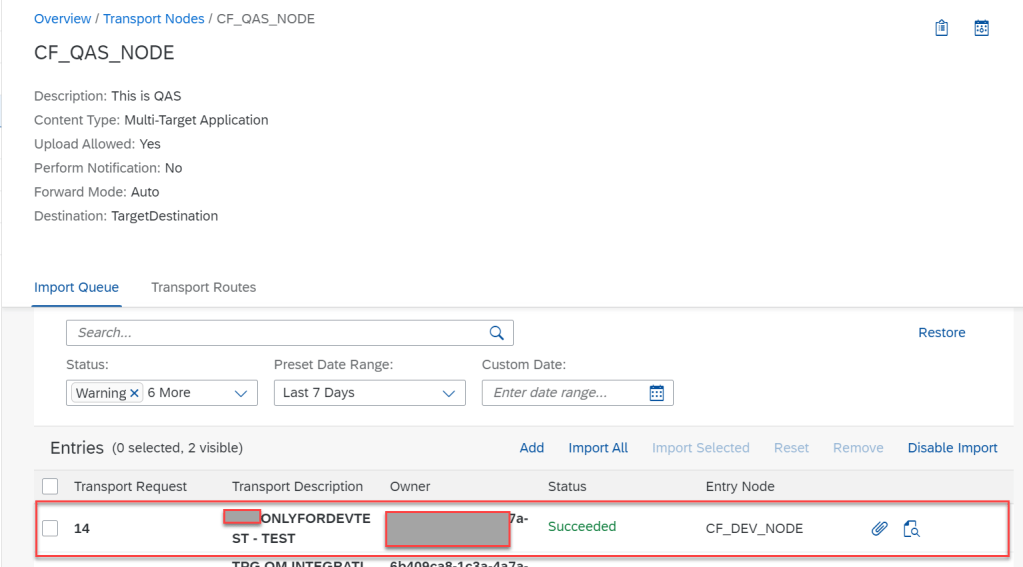
- Check on TARGET

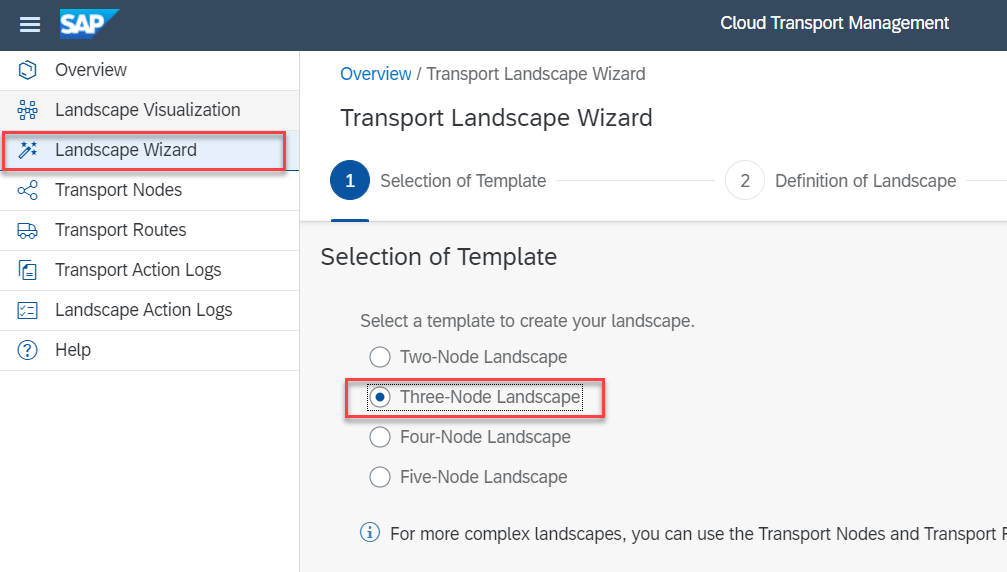
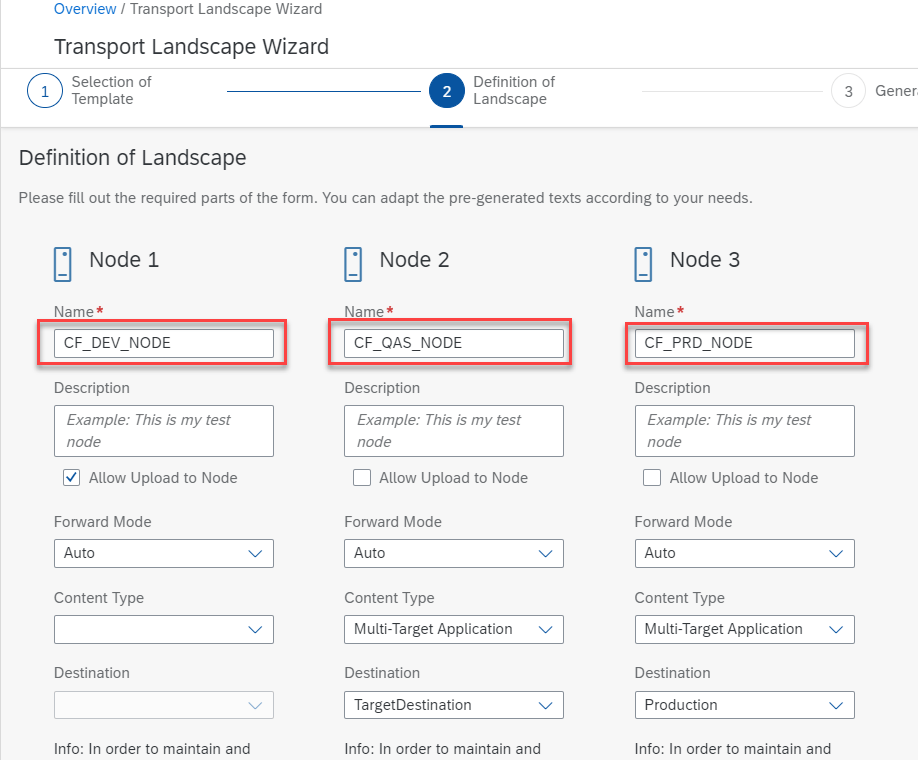
Step 14 Advanced transport with 3 node
Further we need transport 3 node
- DEV (Source)
- QAS (Target)
- PRD (Target)
We expect that DEV -> QAS -> PRD. How can we do ?
OK, let config for this
14.1 Create destination for PRD
- Reference above step to create destination from DEV subaccount
- Example : Production
14.2 Create Transport NODE
Step 14.3 Configuration transport landscape
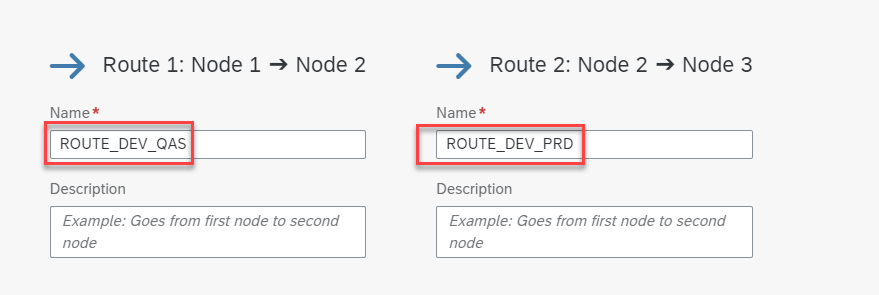
14.3 Create transport request from DEV Integration Flow

14.3 Check TR in Cloud Transport Management
- Choose destination QAS or PRD, we view TR number as well
Summary
Cheer ! In this article I shared my understand about step by step transport package to another Subaccount. Many steps which we have to configuration, kindly follow step by step and check by check every step you configure. Next article, I will explore about transport with CTS+, and hope share my understand for all of you. Thanks for your reading and any advise, kindly leave your comment on this. Thanks.
Joseph.

Hi,
Thanks for taking your time to present this concept.
I think the picture above the Pre-requisites section has this Destination 3 from CAS to TMS.
I think it must be from the Source Subaccount(Dev Tenant) to TMS, like the Destination 1 and Destination 2.
Regards,
Senthil
LikeLike
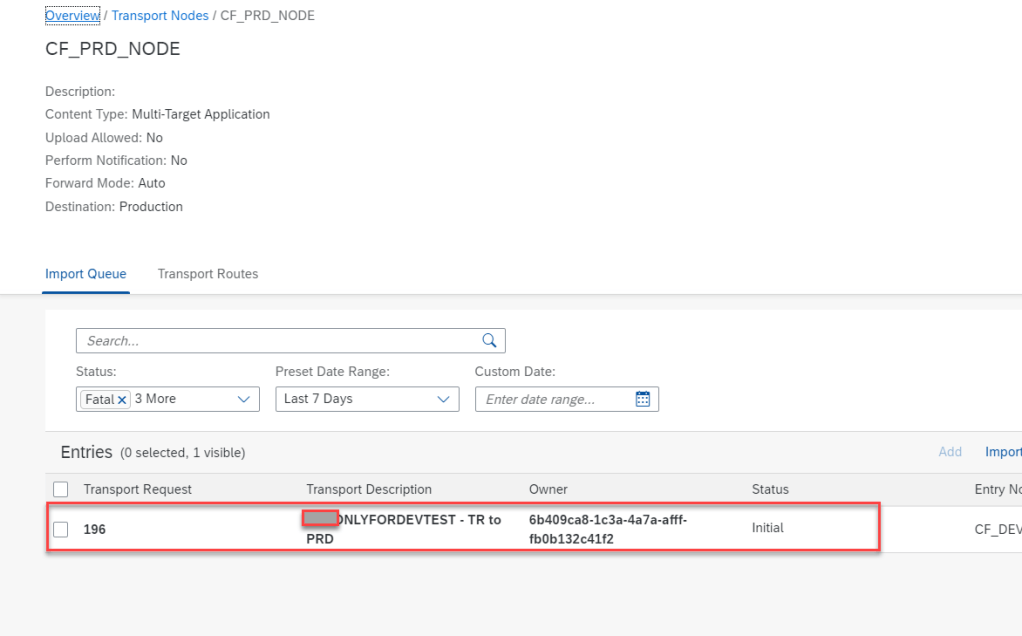
I notice the owner in the CTMS import queue is present in hex format. This is an issue when the auditor ask who is the owner?
How could we get the real owner which is email instead of the hex format?
LikeLike
Great blog, this will work as guide for consultants who wants to configure TMS. Thanks for taking time to write this blog, much appreciated.
LikeLike
Hi
“Org Name Of Target can not have white space”
How do you get around this?
LikeLike
Hello All,
I have an enterprise BTP partner account , Have configured the Cloud Transport Management for transport of Integration suite packages from one Tenant(sub account) to another by referring the below blogs:
After the configuration, I’m getting the below error while checking the configuration on my Cloud Integration transport mode.
Error in the http client {0}:Error while getting slpManagementClient : Unauthorized
Could you please help here? Any help will be highly appreciated!
Regards,
Ankush Dhar
LikeLike
Dear Ankush,
I have no any capture image for this. If can, kindly update capture let me check.
Btw, If unauthorized, you can check Client ID, client Secrect and Toke URL also in every sub account. Because of this TMS often use call API with OAuth2 to configure and setup also.
LikeLike
Hi Team,
i have successfully created the destination, connection is established.
Output: Connection to “Content_Assembly_Service” established. Response returned: “401: Unauthorized”
We have done the configuration in integration level, facing the below error:
Destination configuration not found in destination info Destination name: ContentAssemblyService
Please help for this issue
LikeLike
Hi Santosh,
Help to check service key in your instance. 401 Unauthorized raise when reference invalid ClientID, Client Secret.
LikeLike
I did all the above steps and had a successful connection, I launched the transport from CPI but when I try to import it from “import selected” I get the error “Import to QAS node failed. – Error during client creation: unauthorized”. Are there any settings or features missing from the target system?
LikeLike