Hello guys, in next article in series SAP RAP, I want to share one simple example for you can see basic steps when working with SAP RESTFul Application Programming. This is list of articles in this series
[SAP RAP] – BEGIN WITH RESTFUL APPLICATION PROGRAMMING
SAP RAP implement two scenario:
- Managed : SAP handle CRUD – Create, Read, Update, Delete
- Unmanaged : CRUD with custom logic code
We will explore unmanaged scenario in later artice, in this article we will consider managed code.
By following arrow in diagram, we will know step create app end to end by SAP RAP

Create table
We will create simple table: Employee include fields
- Employee ID
- Employee Name
- Employee Address
- Department ID
Open ADT
Connect to SAP BTP by service key
Create new database table in dictionary with named ZTB_RAP_EMP_887

Copy this code
@EndUserText.label : 'Employee Table'
@AbapCatalog.enhancement.category : #NOT_EXTENSIBLE
@AbapCatalog.tableCategory : #TRANSPARENT
@AbapCatalog.deliveryClass : #A
@AbapCatalog.dataMaintenance : #RESTRICTED
define table ztb_rap_emp_887 {

  key client       : abap.clnt not null;
  key employee_id  : abap.char(10) not null;
  employee_name    : abap.char(10);
  employee_address : abap.char(100);
  deparment_id     : abap.char(10);

}
Create ABAP class to generate data for table
After create database table, we have to input initial data. We can use ABAP class with SQL statement to generate data for it.
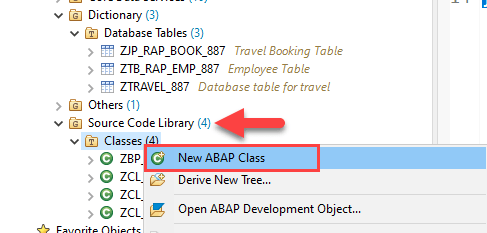
Create class with named ZCL_GENERATE_DATA_RAP_EMP_887

Copy code
CLASS zcl_generate_data_rap_emp_887 DEFINITION
  PUBLIC
  FINAL
  CREATE PUBLIC .

  PUBLIC SECTION.
   INTERFACES if_oo_adt_classrun.
  PROTECTED SECTION.
  PRIVATE SECTION.
ENDCLASS.


CLASS zcl_generate_data_rap_emp_887 IMPLEMENTATION.
METHOD if_oo_adt_classrun~main.
 DATA itab type table of ztb_rap_emp_887.

*   fill internal travel table (itab)
    itab = VALUE #(
      ( employee_id = '0000000001' employee_name = 'Joseph' employee_address = 'Binh Thanh' deparment_id = '0000000001')
      ( employee_id = '0000000002' employee_name = 'Joseph' employee_address = 'Binh Thanh' deparment_id = '0000000001')
      ( employee_id = '0000000003' employee_name = 'Joseph' employee_address = 'Binh Thanh' deparment_id = '0000000001')
      ( employee_id = '0000000004' employee_name = 'Joseph' employee_address = 'Binh Thanh' deparment_id = '0000000002')
      ( employee_id = '0000000005' employee_name = 'Joseph' employee_address = 'Binh Thanh' deparment_id = '0000000003')

    ).

*   delete existing entries in the database table
    DELETE FROM ztb_rap_emp_887.

*   insert the new table entries
    INSERT ztb_rap_emp_887 FROM TABLE @itab.

*   output the result as a console message
    out->write( |{ sy-dbcnt } travel entries inserted successfully!| ).
ENDMETHOD.
ENDCLASS.
Create Root view entity CDS
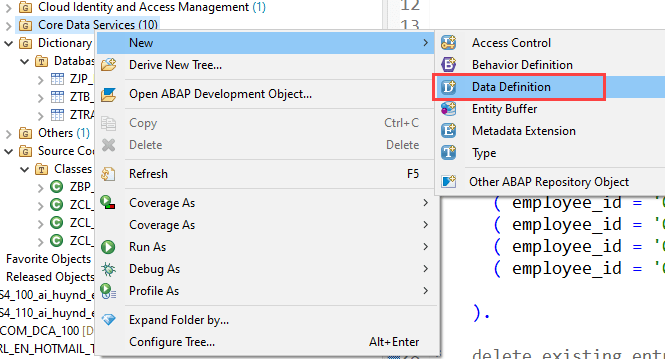

Create Root View Entty with named ZI_RAP_EMP_887
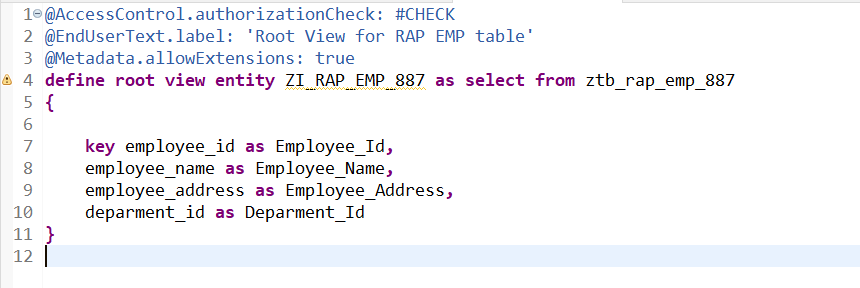
Copy code
@AccessControl.authorizationCheck: #CHECK
@EndUserText.label: 'Root View for RAP EMP table'
@Metadata.allowExtensions: true
define root view entity ZI_RAP_EMP_887 as select from ztb_rap_emp_887
{

    key employee_id as Employee_Id,
    employee_name as Employee_Name,
    employee_address as Employee_Address,
    deparment_id as Deparment_Id
}
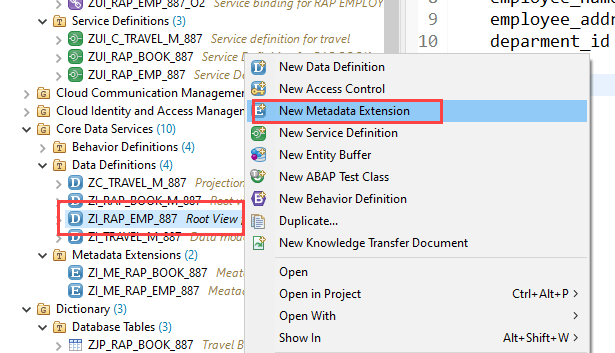
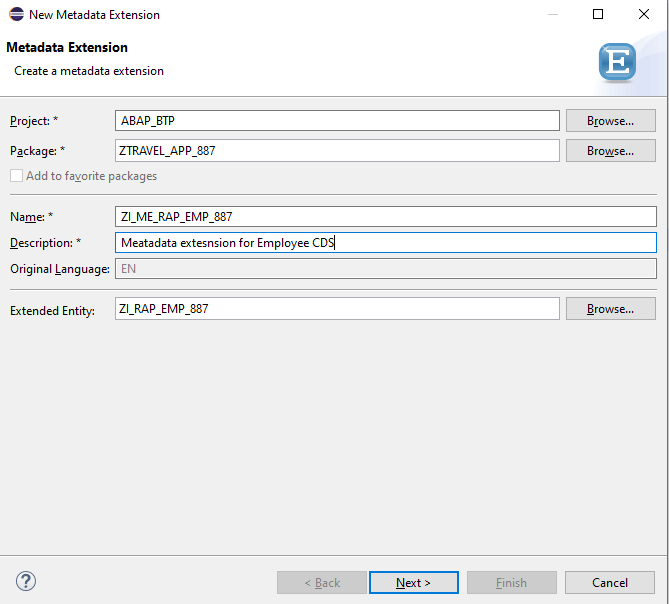
Create meta data extension – Anotation view with @UI
Metadata extension is created to annotate the CDS Entity and fields. We add description, screen position details etc., through these annotations – UI for Fiori application.
For details Anotation and How to use it, kindly reference in SAP Help
Right click on Root View Entity
Choose New Metadata extension
Set name ZI_ME_RAP_EMP_887
Copy Code
@Metadata.layer: #CORE
@UI:{
headerInfo:{
                typeNamePlural: 'List Employee - Table Header',
                typeName: 'Employee Detail',
                title:{ value: 'Employee_Id'}
           }
}
annotate view ZI_RAP_EMP_887
    with
{
   // OBJECT PAGE
   @UI.facet: [
                {
                    id:              'Detail',
                    purpose:         #STANDARD,
                    type:            #IDENTIFICATION_REFERENCE,
                    label:           'Employee Detail',
                    position:        10
                 } ,
                 {
                    id:              'Department',
                    purpose:         #STANDARD,

                    label:           'Department Detail',
                    position:        10
                 }
              ]
    // ELEMENT LIST
  @UI: {
  lineItem: [{ position: 10 } ],
  identification: [ { label: 'Employee ID',position: 10 } ],
  fieldGroup:     [ { label: 'Employee_Id',qualifier: 'Fieldgroup:HeaderItems',
                            position: 10 } ,
                            { label: 'Employee_Id',qualifier: 'Fieldgroup1',
                            position: 10 }] }
  Employee_Id;
  @UI: {
  lineItem: [{ position: 20 } ],
  identification: [ {label: 'Employee Name', position: 20 } ],
  fieldGroup:     [ { label: 'Employee_Name',qualifier: 'Fieldgroup:HeaderItems',
                            position: 20 } ] }
  Employee_Name;


  @UI: {
  lineItem: [{ position: 30 } ],
  identification: [ { label: 'Employee Address', position: 30 } ],
  fieldGroup:     [ { label: 'Employee_Address',qualifier: 'Fieldgroup:HeaderItems',
                            position: 30 } ] }
  Employee_Address;
    @UI: {
    lineItem: [{ position: 40 } ],
    identification: [ { label: 'Department ID',position: 40 } ],
    fieldGroup:     [ { label: 'Deparment_Id',qualifier: 'Fieldgroup:HeaderItems',
                            position: 40 } ] }
  Deparment_Id;

}
In code, we can see sections


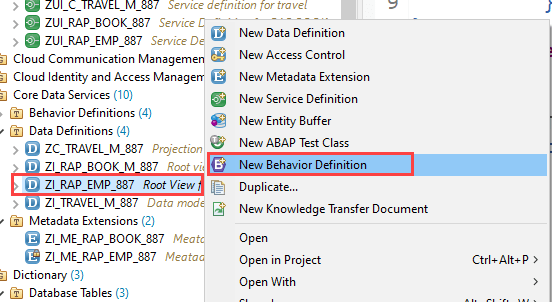
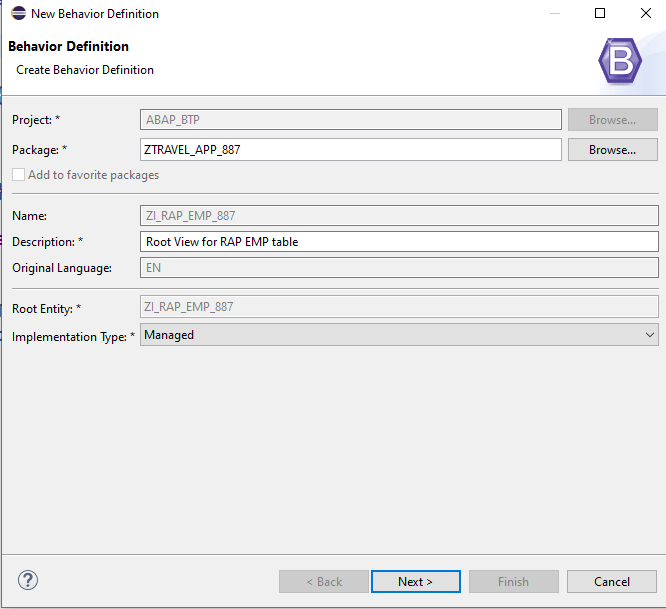
Create behavior definition
Behavior Definition is created to specify operation details that are possible for the Entity. This refers to CRUD operations. By default READ / QUERY operations are enabled.
Right click on Root View Entity
Choose New Behavior Definition
For simple example, we can comment code as below, I will explain later about managed and unmanaged scenario
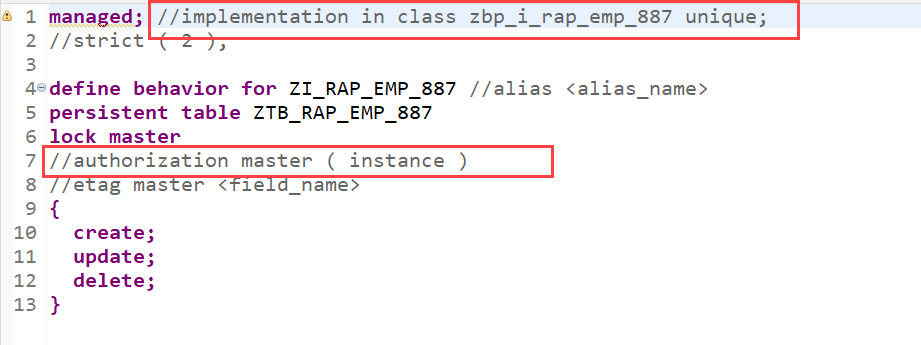
Copy code
managed; //implementation in class zbp_i_rap_emp_887 unique;
//strict ( 2 );
define behavior for ZI_RAP_EMP_887 //alias <alias_name>
persistent table ZTB_RAP_EMP_887
lock master
//authorization master ( instance )
//etag master <field_name>
{
create;
update;
delete;
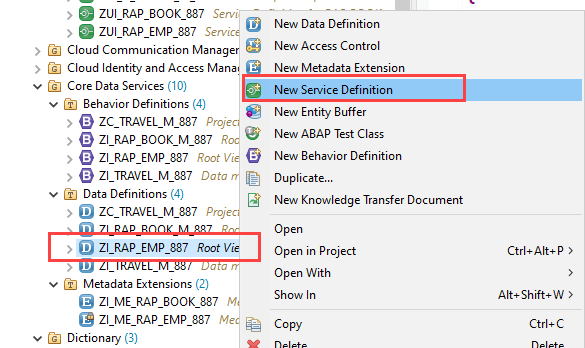
}Create service definition
Service definition defines which CDS entities are exposed as part of the service.
Right click Root View Entity
Choose create new service definition

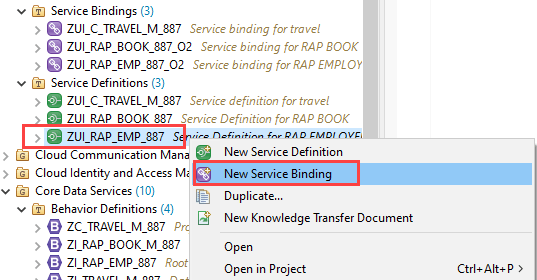
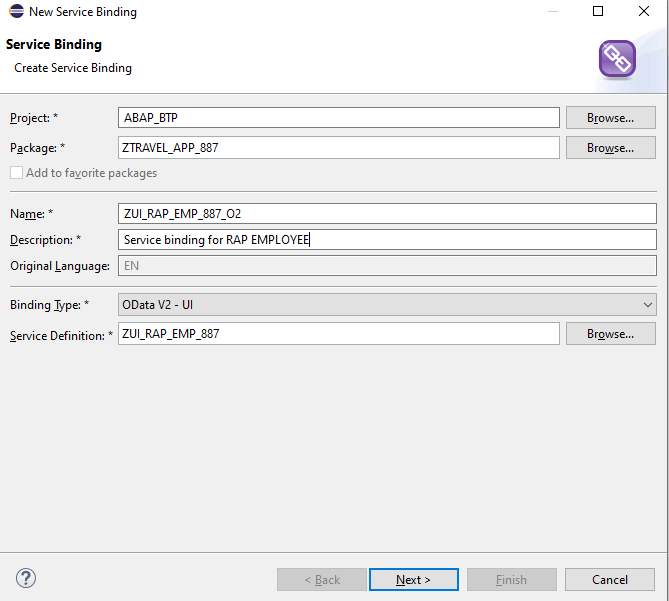
Create service binding
Service binding is created to Publish the service. Here, we chose the protocol like OData V2.
Right click on Service Definition
Choose New Service Binding
Save & Activate
Publish
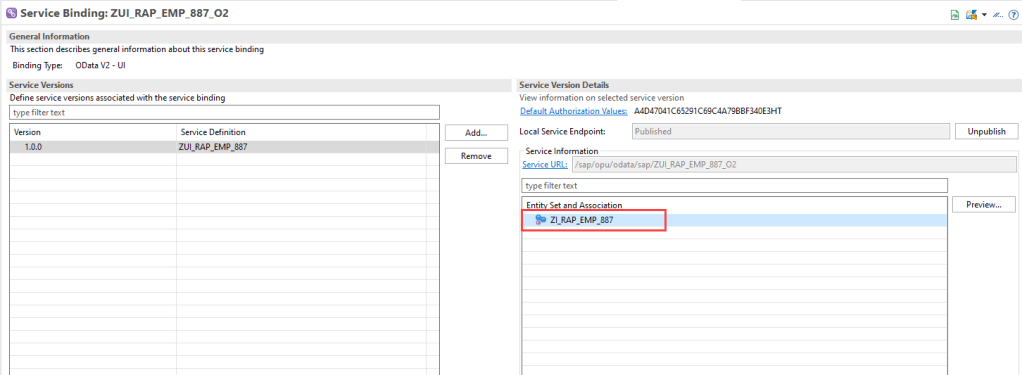
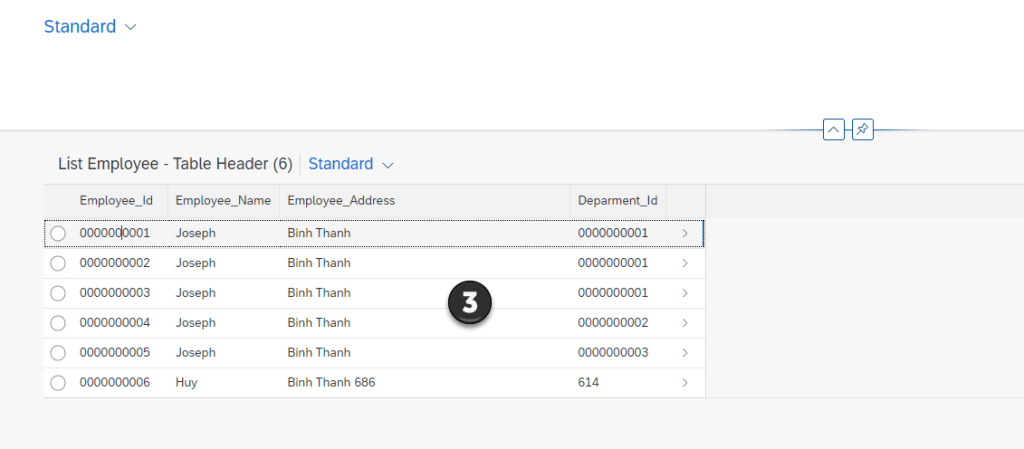
OK, When preview we will have result


Create new

Edit

Summary
In this article, I shared step by step create Fiori Application with RAP very simple. This article help us take overview about RAP model and from here we can explore more and understand clearly RAP. Next article, we will discuss about anotations for Fiori UI and how to custom logic code in Business service layer. Thanks for your reading and any advise kindly leave your comment on this.
Thanks.
Joseph.

Good explanation. Could you please post the unmanaged scenario as well?
LikeLike
Unmanaged scenario, I just can post How to create API with POST, PUT, DELETE method and will be write code in behavior class save method. Ar you ok ? 🙂
LikeLike
Please post Unmanaged senario.
LikeLike
please give unmanaged scenario as well
LikeLike
where is the class being called?
LikeLike
Hi Claire,
In this article, I used class to generate data for example. It’s optional.!
Thanks
LikeLike
ver Useful for freshers who learn RAP application
LikeLike